Nancy Drew and the Seven Ships Walkthrough -- Part Three of Four -- Exploring the Bat Cave
Investigating as George
George has not really served much of a purpose in the game up to this point. After you finish the sundial puzzle, you must poke around as George for a little bit to uncover more clues in the case.
Have George exit the inn and head to the bat cave that you explored as Nancy Drew. When you find the bat steep, you will also find a sliding puzzle. You complete the puzzle by putting the picture in the shape of a camel. The sliding puzzle may take a while, but you do not need to worry about the amount of time it takes you to complete it.The game returns control of the title character to you after this.
Investigating the Ransom of the Seven Ships Convenience Store, Johnny Rolle
When you finally get back out of the bat cave, walk around the outside of the cave. You will come across the Australian license for one John Poole. The person pictured looks a lot like the beach bum, Johnny Rolle, who has a very Jamaican accent. You can bring this up when you next confront him. You can confront Rolle about it if you wish, or you can find the highest spot mentioned in El Toro’s journal.
You will find a cave on the side of the cliff. Monkeys prevent you from going any further, but they keep making the same sound over and over again. If you head back to the resort you started from, you can find out that the monkeys are asking for a ball. Check the journal again and find out that the specific ball the monkeys want is a sea urchin.
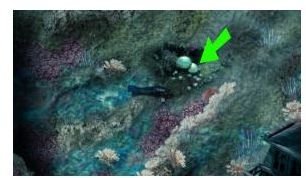
Refill the scuba gear tank if you have not already and sail back to the site where the Cardiad sank. Anchor the boat, put the rope ladder down and descend to the seabed. Pick up a sea urchin and head back to the surface. When you have the sea urchin, give it to the monkeys that you met on the cliff. The monkeys will then let you pass.
Return to the Ransom of the Seven Ships Convenience Store, Johnny Rolle
Go to the very top of the cliff and set up the astrolabe. The ancient device maintains its usefulness for us. You will use it as a navigational tool shortly. Click on the device to see someone moving through the jungle. If you have Coucou’s old perch, put it in the ground and put the astrolabe on top of it. Manipulate the astrolabe until you find the coordinates for various locations. Halfmoon Reef is at NW 40, the Coral Reef rests at SW 20, and the El Caridad shipwreck is at SW 70.
Now that you have the coordinates, sail to the island shaped like a flying dove. Refill the scuba gear’s air tanks at the resort. Aprise George of the new events that have transpired. When you get to Flying Dove island, search for a stand that contains six sundials. Adventure gamers with any amount of experience should expect that the sundials introduce the next puzzle that you will need to solve.
Each sundial contains a letter. When you reveal all six letters, Nancy automatically calls George and tells her to look in the shed for the Atocha coin.
Curious George and the Monkeys
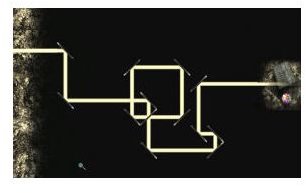
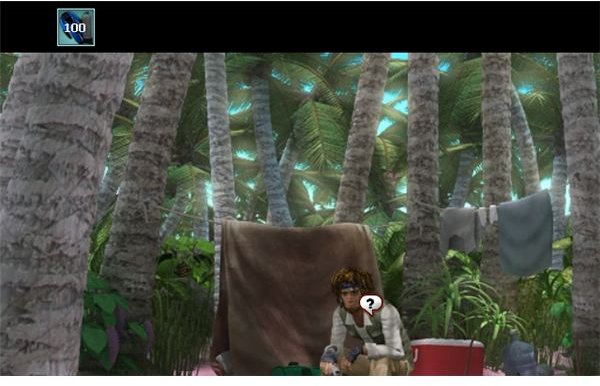
While controlling George, check the shed outside of the resort. The kidnappers who left the threatening note also vandalized the shed. Go out and look at the coin that accompanied the Atocha when the ship sank. Open the shed and find that the coin has been taken. A careful examination of the area reveals monkey tracks near the shed. Go back inside the resort and pick up the field notes. These notes, which Nancy Drew already has, will let George know how to play the three games the monkeys know how to play. Go back up to the primate research center to retrieve the coin from the monkey pilferers. Play the game with the monkey in the middle of the screen to win back the Atocha coin.
Help Nancy Drew Solve the Sundial Puzzle
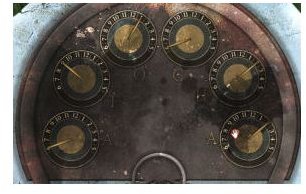
The game will switch control over to Nancy Drew and you must now solve a puzzle involving the sundials.The solutions for the Junior and Senior Detective versions of the game are listed below.
Junior Detective Solution
- Turn the O sundial to 1.
- Turn the first A sundial to 6.
- Turn the C sundial to 6.
- Turn the H sundial to 2.
- Turn the last A sundial to 2.
- Turn the T sundial to 9.
Senior Detective Solution
- Turn the C sundial to 6.
- Turn the H sundial to 2.
- Turn the O sundial to 1.
- Turn the first A sundial to 6.
- Turn the last A sundial to 2.
- Turn the T sundial to 9.
When you have solved the puzzle click the nearest lid. Take the code of conduct and the owl coin.
This post is part of the series: Nancy Drew and the Ransom of the Seven Ships Waltkrhough
Find the links to the other articles in this walkthrough here.
- Nancy Drew and the Ransom of the Seven Ships Walkthrough (Part One of Four)
- Nancy Drew and the Mystery of the Seven Ships Walkthroough (Part Two of Four)
- Nancy Drew and the Ransom of the Seven Ships Walkthrough (Part Three of Four)
- Nancy Drew and the Ransom of the Seven Ships Walkthrough (Part Four of Four)