PC Games: Making New Levels for Braid

Let’s Get Started Making New Levels for Braid
You’ll be creating a new “universe” folder to hold all user-made levels, then another within that named after your level - we’ll use “videogamer”. Getting the base game data in there to work with is a little tricky, so make sure you follow the steps closely.
First, copy package0.zip from your Braid/data directory to the basic braid one, unzip both, and then copy the whole Data Directory into your videogamer folder. Run the game with the command “Braid -editor -universe videogamer -no_packages” and you’re there.
The good news is that building a Braid level is pretty easy. There are handy links to the left as you’re playing with the editor that provide you with trouble shooting hints and advice.
There are a few things that you’ll need in order to build new Braid levels.
- The home of Braid snipurl.com.gkm36
- Braid creator Jonathan Blow’s blog snipurl.com/gkm4i
- BraidsMods, the unofficial home of Braid editing snipurl.com/gkm2f
- The fantastic official soundtrack snipurl.com/gkm5f
Let’s Get Building
Once you have set up the game as described above, load the game. Enter into the first world and the first level. Press F11 to open the Editor, and then click New World. Click Save As and type “world2-1.”, tap F11 to leave the editor, and hop back in. You should be looking at a black void, if everything went as planned.
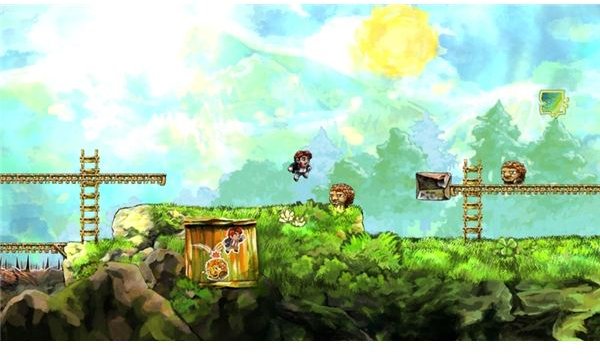
Braid is a tricky game, and what you think you’re looking at isn’t necessarily how the game works. For starters, levels aren’t made up of blocks clicked together to make platforms, but two different types of items: Pieces and Entities. Pieces are the scenery you’ll be looking at, like cliffs and ledges. Entities cover everything from switches to cannons, giving the illusion of a working world.
Time to make an entrance. This door is where John will enter the level. Click Entity Panel from the menu, and Deselect if it’s showing anything. Choose the door item from the list and click Instantiate. A block (not an actual door) appears on the screen. If doesn’t matter where you put this, but drag it around with the mouse.
Let’s make some cliffs and grassland to run on. Click Add Piece Config, and type “ledges_and_caves02”. This will dump all the sets in your Braid/Data/Pieces directory and all of the current Ledges and Caves set onto the screen. Click one and press CTRL-C to copy it, CTRL-V to paste it.
You’re not limited to one position. In the Entity Window, the option facing_left lets you flip the object around and holding down the right mouse button lets you rotate it. Put together a ledge for John to land on, and another one a short distance away. You’ll see other ways to play with Pieces in the list, including Add and Multiply mode, which are useful for creating depth and backgrounds.
Try to run the level, and John falls to his death. This is because all we’ve made is a picture of a ledge, not a ledge itself. Open the Entity window, and choose Surface. Instantiate it and drag it to the start of the ledge. Pressing Tab to create new points, create a path across your ledge. This will be invisible to the player, making it look like the grass graphics are holding John up.
Braid’s Stormy Future

To get John to the second island, we’ll set up a basic time puzzle. Create a Common entity and place it at the end of your ledge. In the Entity Window, set it to Shot Type 3 (the clouds) and a suitable firing rate. Set up another one, but click its Flags options and set it to be “Rewind Exempt”. Set the two up so that the player has to time their jump to make it across in safety, like the real game’s Phase level.
Time to get rid of the black void. Click Add Piece Config and open up some more props. Get one of the large background images and assign it to a depth of 300 or so in the Entities Editor - the higher the number the, the deeper it is. Find something suitable, and use it to add some interesting background effects to at least one of your ledges.
Let’s add one of those fantastic Braid skies to look at. These are a mix of drawn images (a good starting point is the “leveltwo-newbackground04” Pieces set) and overlaid objects. More complicated backgrounds can make use of animated elements, layers of parallax scrolling, and particle effects, as used in the game’s opening screen to produce the game’s title.
You’re not restricted to just making new Braid levels. By creating a Mod file in your universe directory, you can alter almost every variable in the game, from jumping further, to playing around with the time warping effects themselves. This is more than we have space to go into here, but Jonathan Blow’s “sample” universe contains a good example of creating an alternate John.
Much of the editor and the items you have access to are still undocumented, but still important to know about. Boosters for example are how Braid cheats when reversing time. Doors and switches are controlled by assigning each the same string. The more people we see making Braid mods, the better game we’ll have.
For now though, we’re done. You have your basic Braid level. It isn’t very deep or complicated but you’re able to move around, rewind time, and start making use of the tools available to the artist wanting to create their own puzzling world. Check the resource links on the previous page for information on actually sharing your maps, and finding other gamers online.