Morningstar Walkthrough - Fixing the Ship
Morningstar Walkthrough - Help Captain Novak
I
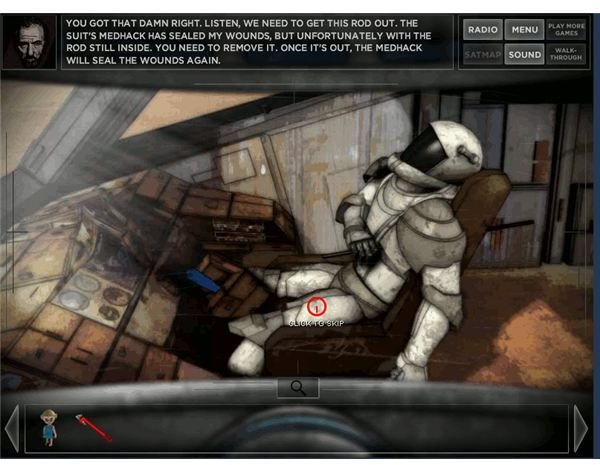
t’s our job to get everything working again. It’s just you and Captain Novak aboard the shipwreck and he’s pinned to the chair with a rod. The first order of business is to see what we can do to help him.
The Medical, Cargo and Engineering Hold are all off limits for the moment for various reasons. Look over into the back right corner on the cargo crates. Grab the wrench and search the back crate to find a doll inside. If it’s empty, check the other one.
Use the wrench to smash the control panel and open up the cockpit doors. Go inside and talk to Captain Novak. He’ll pass out the next few objectives. We need a hardening resin and we need to turn the power back on for the ship.
Grab the screwdriver off of the console and walk back out to the Engineering Hold to the right. Use the doll we picked up before on the control panel to make the batteries open the door.
Go into the Engineering Hold.
The main part of the glue gun is on the floor. Pick it up. The adhesive component is stuck in the space between the two cabinets. Grab the empty fuel cell off of the cabinet too.
Look at the control panel for the reactor. Tight the screws with the screwdriver to close the panel. Since the safety didn’t kick off, use the wrench to whack the panel a few times and reboot it.
That should get the power back up. Go back out to Captain Novak in the cockpit and turn on the computer by using the fancy touch screen.
In short, we’re pretty much up the creek without a paddle.
Morningstar Warlkthrough - Medical Bay Inspection
Well, our clearest objective is to check the carbon filter to see why the CO2 is so high. That means we need to turn off the Ventilation system. Click the bar on the screen to shut it down.
Walk out to the corridor and climb the ladder to go to the Medical Bay.
Inspect the ventilator and check behind it to see that the carbon filter is worn out. We need a new carbon filter before we can take off. Just put it on the list.
Pick up the glass on the desk and look at the hibernation controls to confirm that chamber three malfunctioned. Press the control to open the chamber completely.
Open the first aid kit and grab a syringe from it. You could always find a use for that.
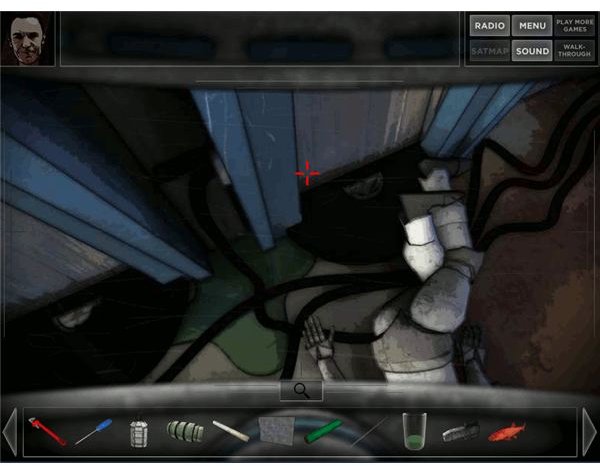
Then go ahead and look at the service panel. Use the screwdriver to take it off and then inspect the pipe. You always end up needing a pipe, so use the wrench to take it off. Also look to the left behind the pipe to find the insulation. Take the insulation foil.
Walk back to the corridor and look at Johansen. He’s already gone, so there’s nothing we can do. Inspect the green fluid behind him and then use the glass we picked up to take a sample of the green hibernation fluid. Go back up to the medical bay and look at the desk. Use the filled glass on the analzyer to confirm that the hibernation fluid is also worthless. We’ll need a replacement for that too.
That should trigger the next message from Captain Novak. There’s another ship out there and it’s probably got some parts that we can scavenge. We’re moving out to loot it.
Before we do that though, we need to get our ship back up to a fairly repaired condition.
Morningstar Walkthrough - Ship Maintenance
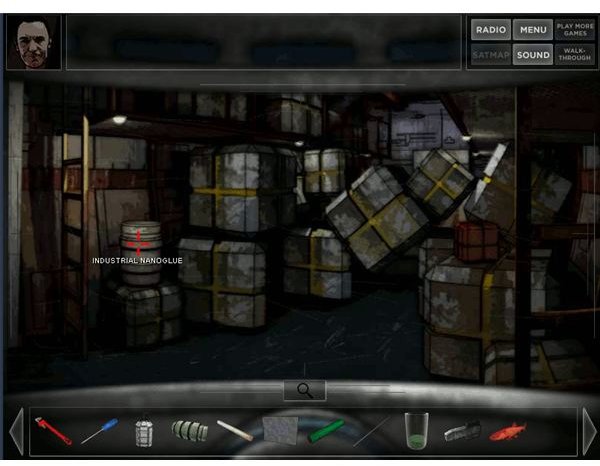
Go down to the cargo bay. Check the boxes to find a firecracker and a red herring (a joke about a worthless clue just there to distract you, in case you haven’t heard the term before). There’s also a drum of industrial nanoglue, so we’re in luck. Use the syringe on the nanoglue and go back to Captain Novak.
Use the syringe on Captain Novak to pull out the steel rod and seal his suit.
Use the new steel rod that we pulled out of Novak to move the containers out of the way. Walk up to the loading area and pick up the can of beer off of the floor. Grab the gas mask too.
The control panel here actually needs to be rewired. We can’t just override this one with a wrench. Walk back to the hibernation chambers and inspect Johansen’s chamber.
Use a wrench to unscrew the hibernation fluid tube. Grab the adaptor that remains on the chamber and the
n grab the electrical wires from below it. Also inspect the drain. There’s something inside it, but we need to fill it up first. Use the beer we just got to fill up the drain and reveal the application head for the glue gun. Put it together to complete the glue gun. That’s one big step at least.
We can also put the gas mask to good use. Use the new adaptor tube on the gas mask to turn it into a basic carbon filter. Use the insulation foil that we grabbed earlier to finish it off. Go back to the Medical Bay and put the new filter in the ventilation system. Walk back to the cockpit and turn the ventilation system back on to fix the CO2 situation.
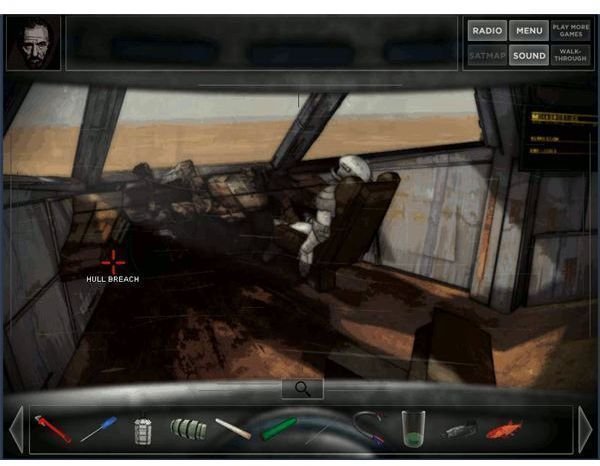
Walk back to the Cargo Bay and fill our new glue gun up with nanoglue. Go to the Loading Area and use it to fill the hull breach on the right side. Walk up to the Cockpit next. Use the nanoglue to seal the breach on the bottom left side. The last one is in the Medical Bay. It’s behind the pipe we took out in the service panel.
The last thing to fix is the broken Loading Area panel.
Use the electrical wires to open the door and head out into the desert. Unfortunately we get stopped by the Gorge.
Morningstar Walkthrough - The UNS Armstrong Wreck
We need to make a bridge and ultimately inspect the body and cargo crate that fell into the gorge itself. Look at the cargo container to get a bottle of insecticide with a lot of sulpher. Then look at the sand near it to realize that it has a lot of salt peter. Combine the sand with the bad carbon filter and the insecticide to make a crude bomb. Place it on the large stone pillar behind the stone heads. Use the firecracker we picked up earlier to set it off and make a bridge.
We can’t decide to the lower ledge until we have a rope, so just go into the desert and go the rest of the way to the military cruiser wreck.
Walk over to the ship and then get into the bridge. Search the skeleton in the bridge for Simon Mendez’s passcard. Grab the energy cable too.
We can use this for the gorge in a minute, but let’s finish with the ship first. Go into the hibernation chamber to the left and walk up to the first locker. Use the passcard to get a rifle with a single charge in it.
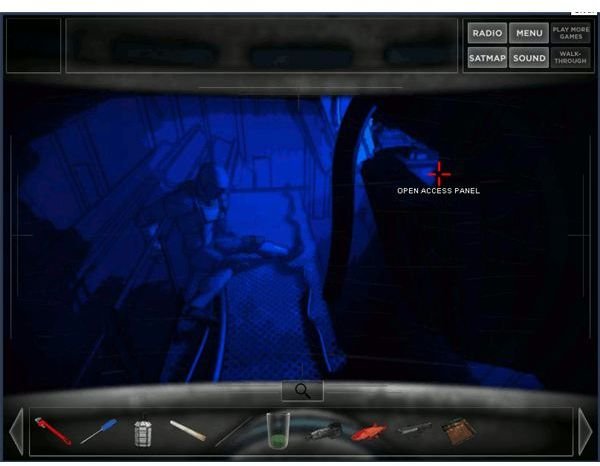
Go back to the bridge and walk down into the access tunnel. Use the plasma rifle to melt the control panel and unlock the seal. Use the steel rod to pry the access to the engine room open. Examine the left engine. Search the body for a log. Read it to get the coordinates for their scout camp. Use the screwdriver on the engine access panel to open it up. Search the open access panel to grab the plasma injector that we need. That’s one more thing off of the list.
Go ahead and go to the gorge. Cross the bridge you made and use the energy cable to get a rope that goes down to the corpse. Search the body and open the crate to get some copper wire and a shovel head.
Morningstar Walkthrough - The Camp
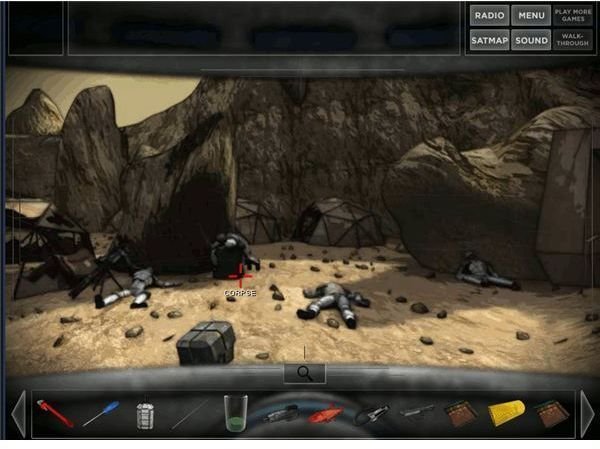
Walk to the camp next. Check the bodies until you find Coulter’s passcard and a log concerning what happened at the camp. The captain set up a distress beacon somewhere, so we should start looking for it. There’s also one very stubborn cargo container in the front of the camp.
Look behind the rock to find the grave. Combine the steel pipe from earlier with the shovel head to make a basic shovel. Use this to dig up the grave. Search the body twice to get a broken PDA and and a taser.
Search the tent too to find another corpse. Check the corpse and pick up the rope beside him.
Go back to the wreck and go to Coulter’s locker on the left side. Use the passcard and then search the locker twice. You’ll get a buddha statue and a picture frame. The buddha statue is really heavy and we really need a good crowbar. Use the statue on the steel bar to bend the end and make a basic crowbar.
Go back to the camp and use the crowbar on the stubborn crate to reveal a broken radio. Use the broken PDA on it to make a working short-range scanner. It’s need a range boost, so search the other tent on the left for a thin tent pole. Use this on the scanner to boost the range. Go back to the desert, but use the scanner. It should highlight a distress beacon further to the right.
Go to the Crater and look down. There’s nothing to do in the gorge. Go over to the wreckage on the right to get the last passcard and some breaching charges from the wreck.
Go back ot the ship and open the last locker. Search it for a plasma flare.
Go back down into the Gorge by the body. We can now explore it further. Tie the rope onto the boulder to the far right side. The plasma flare needs to be filled, so use the plasma injector on it to fill it up. Toss it to the bottom of the Gorge. Go down the rope and search the body to get a watch.
Morningstar Walkthrough - The Alien Gravity Anomaly
Go back to the wreckage. We now have everything that we need to activate the breaching charge. Use the taser on the breaching charge to provide a detonator for it. Then add the watch to provide a timer. Use this charge on the door to blast your way into the alien structure. Go
through the hole to see the generator powering the gravity anomaly.
If you go through the door on the right, you’ll see a console and a whole library of captured specimens. Since the captain is still missing, let’s see if they have an entry for Earth. Go to the main room and through the door on the left to find their large starcharts. Page through the systems until you find the Solar System. It’s easy to spot thanks to Saturn and Jupiter. I believe it’s the circle on the far right.
Make a note of the symbols that show up for the map. Walk back down to the storage room and use the console. Punch in the symbols to open up the Earth chamber. Inspect the skeleton and then examine the belongings below to find the captain’s log. Read it to learn that the chamber next to him has an algae in it that can substitute for hibration fluid. That’s lucky. He also calls it the lonely planet, so go back to the starchart room and look at the charts for a system with only one planet. I believe it’s a circle on the left. Use this code to open the algae container. Take a full sample with your glass.
Now, while we’re here, note some more symbols. The tanks artificially suspend objects when they’re on. They’re red if they’re on. Look at the red chambers to the left and right to note the two symbols that mean on. Look at the ones we opened to see the symbol for off. Look at the bottom of the device in the algae container (the skeleton is blocking the Earth one) to see more symbols. Since this is a gravity chamber, that probably means something like gravity.
Good to know.
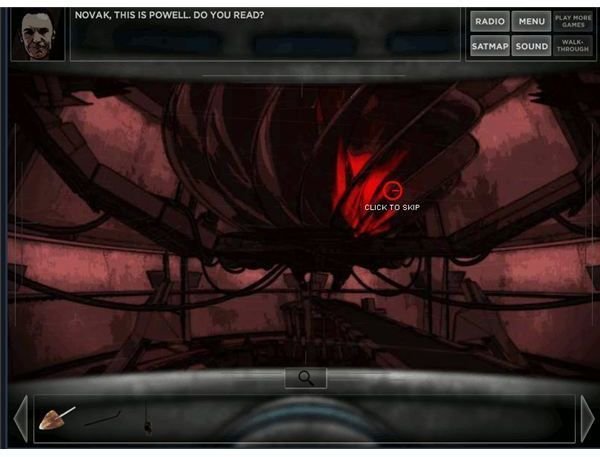
Go back to the generator. We need to turn off the gravity and power up our fuel cell. This just means using the generator. Walk to the end of the middle hallway to find another console. Look at the energy cable to get more symbols. These refer to the power, so get ready for a lot of number punching.
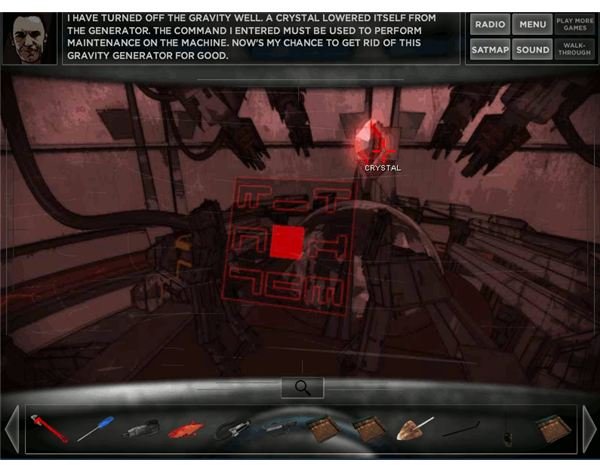
Use the symbols for power and then the symbols for off. Put all five in and hit the center button to turn it off. Jury rig a transformer using the copper wire and the metal picture frame and attach it to end of the cable (look for the point where it connects to the console). Turn the power on by using the code for power with the code for on. Turn it back off and retrieve the charged fuel cell.
Now, punch in the code for gravity and off. Hit the button to turn off the anomaly. It will release a big crystal. Reload the particle rifle with the fuel cell and then use it to blow up the crystal. We’re ready to leave this planet.
Morningstar Walkthrough - Escaping the Planet
Try to leave. There is now a stone head blocking the way. This seems fairly hostile, so ready your particle rifle. Take a shot at the stone head. The result isn’t really optimal, but it at least moved out of the way. Run out the exit to proceed through the desert as night falls.
Walk back onboard the ship. We just need to get it back in working order quickly.
Go to the Medical Bay and analyze the algae. It will be a suitable replacement and the AI will use it to regrow the food supply.
Go into the Engine Room and use the fuel cell on the main reactor to ready it for a jumpstart. Then use the plasma injector we picked up awhile ago to fix the middle engine.
Once all this done, go to the Cockpit and use the navigation computer to initiate the launch sequence and escape before the stone heads find you.