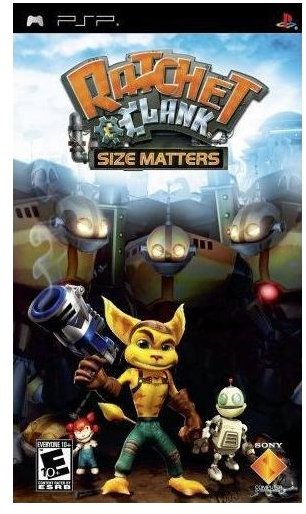
Ratchet and Clank Size Matters Walkthrough for the PSP -- Vacationing on Pokitaru

Ratchet and Clank’s Pokitaru Vacation
Ratchet and Clank have a full time job saving the universe. It seems that some unkind fate must have looked down upon them, because they always end up needing to save the universe while they are on vacation. Ratchet and Clank: Size Matters starts out the way the series usually does, with our heroes trying to take some time off from their dangerous vocation.
As fans of the series know, Ratchet’s decision to take a vacation tends to be a quick way to ensure that Ratchet and Clank will be called upon once again to save the universe. This time, their quest starts on the Planet Pokitaru with a girl approaching them for the school project.
Entertaining the Young Journalist
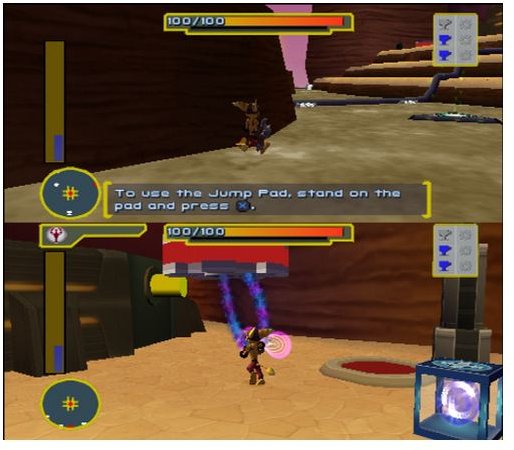
The young journalist asks Ratchet to fight some robots so she can get pictures for her school project. She even knows where some of these robots for you to fight are. Ratchet agrees and equips his lacerator and his trusty wrench. Follow the little girl up the path. A few crab robots come charging to wards you. A few shot of the lacerator will take them out.
Walk up the path until you come to a wall. The center is slightly lower. The little girl tells you how to do a high jump. Follow her instructions and get over the wall. Equip the lacerator if you have not already and shoot the robots in the Hawaiian shirts that come out of the buildings and start attacking you. Take them out and then go over to the bolt.
Attach the wrench to the bolt and move the joystick around in counterclockwise circles. The door comes down and you will come to a small canyon that you cannot cross in a single bound. You will need to use the long jump the little girl describes. (Alternately you can just press X twice to double jump across the canyon.
Ratchet and Clank Blow Down a Door
You are almost to the first continue point. Enter select mode and aim at the target on the door. You can throw your wrench at it, if you are close enough, but the best way to open the door is to use the lacerator. When you open the door, switch back to third person mode and walk across.
More crab bots come out to attack you. Take them out and then go behind the waterfall. Open the crates that contain more bolts and some more ammo. The small girl that has served as your guide will jump up onto one of the nearby ledges. Use the high jump to reach her. She explains how to use the quick-select weapons feature. You can use the acid bombs as she suggests or you can just continue using your lacerator. (It is easy to take them out with the acid bombs, by the way.) When the robots on the far ledge have been defeated, jump across the ledge.
You have completed what passes for the training in Size Matters. You will receive no more instruction from the little girl. Jump into the sand below. It will slide you into the next area. Defeat the festively dressed robots and get the bolts and additional life power here if you need it. Get the ammunition as well.
Turn right when you reach the end of the buildings and head into the cave. This contains a new kind of robot which can shoot energy bolts. Use the rocks for cover and defeat the enemies using ranged weapons. Head on out of the cave and you should find another vendor here. Refresh your supply of lacerator ammunition and go to the right until you reach the continue point.
Ratchet’s Gravity Boots
Enter select mode and aim at the target on the door. You can throw your wrench at it, if you are close enough, but the best way is to continue to use the lacerator. When you open the door, switch back to third person mode and walk across.
You will find some more of the crab bots coming out to attack you. Take them out and then go behind the waterfall. You will find crates that contain more bolts and some more ammo. The small girl that has served as your guide will jump up onto one of the nearby ledges. Use the high jump to reach her. She will explain about quick-selecting weapons. You can use the acid bombs as she suggests or you can just continue using your lacerator. (It is easy to take them out with the acid bombs, by the way.) When the robots on the far ledge have been defeated, jump across the ledge.
You have completed what passes for the training in the game and you will receive no more instruction from the little girl. Jump into the sand below. It will slide you into the next area. Defeat the festively dressed robots and get the bolts and additional life power here if you need it. Get the ammunition as well.
Turn right when you reach the end of the buildings and head into the cave. This contains a new kind of robot which can shoot energy bolts at you. Use the rocks for cover and use whatever weapons you have at your disposal to defeat the enemies you see here. Head on out of the cave and you should find another vendor here. Refresh your supply of lacerator ammunition and go to the right until you reach the continue point.
The Tecnomite Artifact
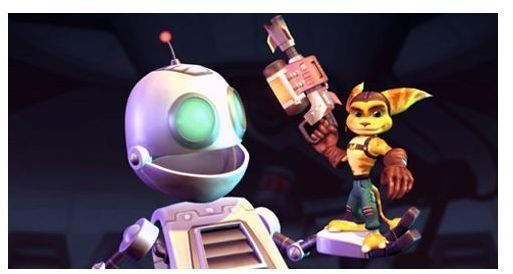
You will see the evil robots take the little girl away into their ship. They leave a small piece of technology behind. Clank, who often seems to be the brains of the duo, identifies it as a tecnomite artifact. Watch the scene fold out and enter your ship. Your next destination is the Jungle World of Ryllus.
Starting on Ryllus
When you land on Ryllus, watch another cut scene and get something that seems like it might be useful from Captain Quark. Head for the tower that Quark half-heartedly suggests is your destination in an attempt to be useful. Go down the steps. If you take ten cameras here, you can earn a skill point. Go down to the arena and be accosted by strange two armed figures. Use the concussion gun if you have it or the lacerator. Clear the area. Climb up the stairs on the side of the arena to get a titanium bolt. Come back down the stairs and use the other exit to further explore the area.
You will encounter a carnivorous plant or two. The key to defeating them is to dodge the balls of gas they throw at you. It take three hits with the lacerator to take them out. The stegosauruses are trickier as they often attack in groups. The key is to move when they start firing. At the end of this area, you will encounter a strange plant-like scientist. Ratchet will ask the scientist to give him the item he is holding. The plant will eat Ratchet instead. Watch the cut scene showing the scientists triumph. The plant spits Ratchet out and the scientist gives you the sprout-o-matic
Use the sprout-o-matic on the nearby sprout and then water the nearest patch of electrosoil. The sprout becomes a bomb plant. Use your wrench to knock the seed pod into the wall blocking your way and into the cavern on the side. Get the boots from the side of the cliff. Walk in and defeat two more of the carnivorous plants. There is a cavern off to the side where you can replenish your ammo supply. You will also find another plant sprout here.
When you have defeated the carnivorous plant, use the sprout-o-matic on the plant and then on the electrosoil. The plant grows into a ladder. Climb up the ladder and face more ape-like creatures and the stegosaurus. When you clear these obstacles, use the sprout-o-matic on the plant at the far end. Water the electrosoil and the plant grows into a giant slingshot. Hit the plant with your wrench to get to the next platform.
There is another vendor here. Use it to replenish your ammo supply. Use the yellow bulbs hanging in the air to swing across the platform. Defeat all of the carnivorous plants in this area and the ape-like creatures. The platform up and to the left contains a pod plant. When the left and right platforms are clear, grow the plant in the electrosoil patch on the lower platform.
Getting to the Temple
Grow the bomb plant and use the wrench to knock a hole in the wall. Water the plant again and get the sprout on the other side of the platform. It transforms itself into another slingshot plant. Use the bulb to swing across and get to the temple. It seems that this is the end of the line. Clank dismounts from Ratchet’s back. Clank enters the temple without a problem.
There is some more instruction, but this time it comes from the game this time. Defeat a few robots and come to the the first set of gadgetbots. Follow the instructions on how to command them throughout this section. The hardest part is the arrow trap. Follow through carefully so as not to lose any robots. If you lose one, you can tell the gadgetbots that made it to wait to the other side. Go back and get any robots that were destroyed.
Follow the same procedure if you lose any gadgetbots when going down the ramp with the rolling rocks. The final puzzle requires you to throw the gadget bots against the targets against the wall. When you finish the puzzle, you will be able to get into the final area. Go up he ramp and out the other side. Wake up the sleeping Ratchet and enter the temple once again.
The Annoying Hoverboard Race

Mini-games affect many modern games like a virus. It is even more annoying when you need to complete a mini-game in order to continue into the main game. This is the case with Ratchet and Clank: Size Matters. The strange futuristic skater type challenges you to a hover board race. If you win, he will give you the shrink ray.
Although this is bad design, you must defeat the challenger in order to get the shrink ray. You need it to enter the grind locks you will find throughout the rest of the adventure. Go back down the other way, and use the yellow bulb to swing across the chasm. Walk up the other platform until you get to the grind lock. Use the shrink ray and enter the grind lock. Avoid the obstacles and hit the triangular signs to open the portals through the grind locks.
Getting to the Facory
Walk through the door and clear any enemies in your way. Eventually you will come to an area with a Gadgetron vendor. Pick up more ammo and walk onto the platform. The platform starts descending. It will come to a series of stops and robots come out to attack you. The pattern continues until you come to the bottom. When the game tells you to jump off, do so.
Run to the monitor on the other side of the room and activate the system that causes the strange yellow liquid to rise. Jump up on the platform and jump to the platforms on the side of the shaft. They platforms are arranged in a circular pattern. When you come to the last of the series, jump on the floating platform.
When you get back up to the top, run across and get to the other platform. Jump onto the conveyor belt, and get to the other side by using your wrench to swing across. Walk forward until you come to another bolt. Use your wrench to raise the platforms. You must swing across to get to the platforms. Run across them quickly and then swing onto the next bulbs before they fall into the liquid. Repeat this procedure until you get to the open door way on the far right. Follow the doorway until you come to a strange sphere.
The Strange Magnetic Sphere
You will use your boots walking through this area. You must stay on the pathway. Knock the robots coming along the path out of your way and follow it until you find the square entrance into the next area. You will find another conveyor belt. Jump across the belt until you reach the far end. Do a running jump or a double jump to get to the final area. Replenish your ammo at the vendor here. You have reached a continue point and the area before the first boss.
Defeating Mungo
The first boss in the game is a large purple ape. The attack goes in three phases. The first phase involves him swinging his arms at you. Simply dodge the arms and shoot at him between his jumps. When you have him down to 75% health, he will jump to the side and activate the floating grenades.
Crates will spawn at the side circles. You can use these crates to refill your ammunition and to get health back. Use the lacerator to shoot at Mungo between attacks. He will switch to the other side when you get him down to 50%. Repeat the procedure until he gets down to 25%.
When Mungo’s health reaches 25%, he jumps back into the arena and picks up a large bar. He attacks you with it. Jump over the bar when he swings it at you and shoot at him between attacks. At about 12% he starts stomping on the ground and sending out flame attacks. Jump over the flame waves when he does this, and shoot at him the other times. When you defeat him, get the item from the second ring. It seems that the little girl has engaged in a deliberate deception.
