Legend of Zelda Twilight Princess Snowpeak Mountains Walkthrough
Return to Telma’s Bar
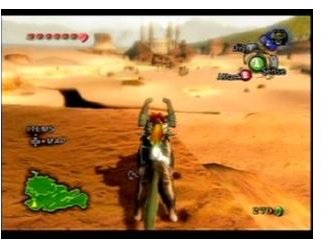
Now that you are done with the Arbiter’s Temple, it is time to find the Twilight Mirror. (You originally came to collect the mirror from the Gerudo Desert. The mirror rests not far from the exit of the temple.
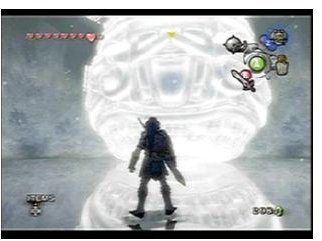
This part occurs in the same temple. Go across the bridge and up to the mirror chamber. Five twilight creatures accost you when you enter the room. Even hardy adventurers such as Link weary of battle. If you get between the creatures, they will open another warp point that leads back to Hyrule Castle town Enter the warp gate and find yourself outside of Hyrule Castle Town.
Coming here in human form is unusual for Link, but the mailman seems to have no trouble locating you. Take the missive and learn about a new type of bomb Barnes is now selling at his shop. Go to Telma’s Bar and have a drink. The patrons will also tell you where to go next. (There is even a convenient map for you to follow.) Your next destination is Snowpeak Mountain.
Getting to the Snowpeak Mountains
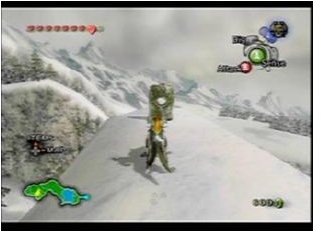
Use the warp point to get to the Domain of the Zoras. Go to the bottom of the lake and then climb up the mountain until you meet a person named Ashei. Ashei seems to be a bit of an artist, and more importantly, he has a sketch of the next monster you need to face. The next few parts of the game are relatively easy, but they help set up the end game for Twilight Princess.
The next person you need to visit is in Karaiko Village. Warp to the small village and head to the graveyard. Find Prince Ralis beyond it. Give the man the sketch and he will give you a coral earring. The piece of jewelry might seem odd, but you do not need to wear it. The earring finds its way to the end of the fishing line, where it will be used as a lure to catch the reekfish.
Go back to the Zora domain and catch a reekfish. (Despite the fish’s foul odor, the game shows Link catching it rather happily.) Go into wolf form and get a good whiff of the reekfish, as much as you may not wish to do so. Follow the scent trail back up Snowpeak Mountain. The scent trail ends at a wall. Go to the right of the wall until you can pick up the wondrous smell of reekfish again. You should eventually find an area that you cannot cross, but luckily there is a lot of loose snow in the area. Find a way to knock the snow down and you can proceed.
When you get the other side and use the howling stones found in this location, revert to Human form and you will eventually find a Yeti. Listen to his dinner invitation, but roll into the nearby icicle to knock it down. Use the icicle as a snowboard to get to the ruins that grace this mountain.
Snowpeak Mountain Ruins
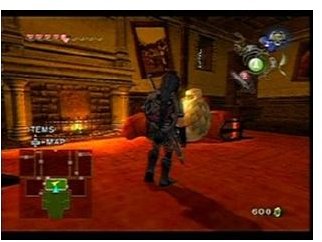
The foyer of the first room does not introduce many complications. Go to the ice in the first room and enter sense mode. Find and defeat the Poe here to get a piece of Jovani’s soul. Walk into the next room and encounter yet another yeti.
She tells you a tale about her husband finding some sort of pretty mirror. She would like you to retrieve it for her. Get the dungeon map from her and exit from this room through the door to the back. Her husband makes soup in the next room. Get an empty bottle and restore some soup. This soup can function as a minor healing potion in emergencies. It seems to be missing the perfect ingredient, however.
Getting Out of the Kitchen
A block prevents you from getting into the rest of the mansion. Move the block onto the door over to the switch. Once you have the block in place over the switch, walk through the open door. Enter the next room and transform into the wall. Sniff along the wall until you find a crack near the bottom of the bricks. Dig under the bricks until you recover a small key.
Enter the room to the West and walk down the hallway. The key you got from just outside of the kitchen opens this door. Defeat the three icy enemies you encounter in the next room. (It is far easier to do this in human form, by the way.) Go to the west and two more icy foes try to halt your progress. Remove them from the way and open the chest that appears.
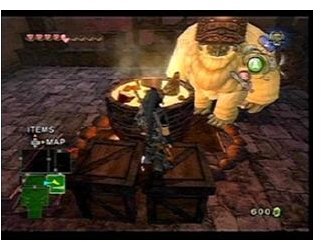
The chest does not contain a key, as you might expect. Instead, it contains a pumpkin. Go back to the kitchen with the pumpkin. Hand it to the husband and he will put it in the soup. Get some more soup and go back out to the living room, where the wife waits for you. Give her some of the soup and tell her about the secret ingredient.
The Next Key Location
Exit through the Northern door of this room. You will enter into the courtyard. The cannon you find here is for decorative purposes. The window is not. Walk through the window on the northwestern side of the courtyard. Find the cannonball behind the window. You cannot get back out the same way, but a navigating a brief maze returns you to the court yard. Load the cannon ball into the cannon. Some kind soul has already included the other things you need, including gunpowder. Find the compass in the room and then find your way out.
Transform into a wolf in the court room. The radar will show an object to the south. Dig where the map locates until you find a small key. Unlock a door to the east and pull the lever there.
Go back to the cannon and launch a cannon ball at the ice beast. Go back to the eastern door and blast away any obstacles you encounter. When you clear away the obstacle, get ready to face the Snowpeak Ruins mini boss.
Getting to the Yeti’s Bedroom

It is too early in this dungeon to suspect that people, especially people from Ordon, are the main ingredient in the Yeti’s soup. A few hints have been dropped that indicate that this will be the case. The next room contains a few more creatures that are easily taken out with your morning star, or Ball and Chain, as Twilight Princess calls it.
Go to the southern door, passing by the spiral and pick up the cannon ball near here. Go over to the wall and feed it to some strange device. Pick up another cannon ball and load it into a cannon this time. Fire the cannon to the west. Pay attention to the path and find a way to get into the area where the ball lands.
A few enemies spawn along the way. Use whatever you need to defeat them. At the end of the path, you will find a path to the chest. Take the bedroom key from the chest and get ready to face the boss of the Snowpeak Mountain Ruins. Talk to the sick yeti who will direct you to the bedroom.
It’s made from Link!
Walk up to the bedroom and use the key. The friendly husband who invited you to dinner turns into a deadly ice foe. He did mean to invite you for dinner, as part of the main course. Start off the attack by using your ball and chain to shave a few pieces of ice off of him. The enemy will disappear during the next phase, but all you have to do is avoid falling icicles. You can see where they land by shadows on the floor.
Wait for a ring of icicles to fall down. Find the gap in the icicles and enter it. Hit Blizetta from the ice ring here. When she dies, get ready to claim your reward.
Sources
IGN Legend of Zelda Walkthrough
Legend of Zelda: Twilight Princess
Personal Experience
This post is part of the series: Full Walkthrough for Legend of Zelda
Get help and answers for every part of Legend of Zelda: Twilight Princess.
- Legend of Zelda Twilight Princess Walkthrough for the Wii: Part One
- Legend of Zelda Twilight Princess Walkthrough for the Wii: Part Two
- Wii Legend of Zelda Twilight Princess Walkthrough: Part Three
- Legend of Zelda Twilight Princess Walkthrough for the Wii: Part 4–Goron Mines
- Legend of Zelda Twilight Princess Walkthrough for the Wii: Part 5 – Karaiko Village after the Goron Mines
- Legend of Zelda Twilight Princess Walkthrough for the Wii –Part 6 of 10– Lakebed Temple
- Legend of Zelda Twilight Princess Walkthrough for the Wii – Part 7 of 10 – After the Lakebed Temple
- Legend of Zelda Twilight Princess Walkthrough for the Wii – Part 8 of 10 – Arbiter’s Temple
- Legend of Zelda Twilight Princess Waltkrhough for the Wii – Part 9 of 10 – Snowpeak Mountains
- Legend of Zelda Twilight Princess Walkthrough for the Wii – Part 10 of 10 – Sky Temple and Final Bosses