Look into the Lego Batman Wii walkthrough to get an idea of how the game is played, and the cool tricks you can do while playing. This is something any gamer will want to know when playing the game at home, and become stuck on a level. Find out more about the game today.
There are a number of levels in Lego Batman for the Wii console. This is why we are going to go over the basics, and some cool new moves you can do while playing the game in this Lego Batman Wii walkthrough. Find out everything you need to know when it comes to fighting the bad guys, and saving the day right over your TV.
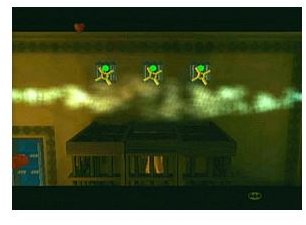
Banking Batman
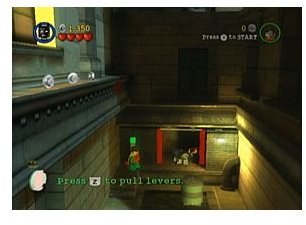
You will want to beat up the bad guys in the streets during chapter one, and locate the lever that is in the corner of the alleyway across the street. Pull it down. You will find disassembled Lego pieces that you will want to put together to form a platform. You will then want to move to the top, and pull the lever so you can get the Lego canister. There are 10 Lego canisters in each level. There is another canister at the top of this level as well in the first telephone booth.
Free Play: During this time, you do not have a Sonic Suit to help you out. Once you receive the Sonic Suit later on in the game, you can then do this part of the game fairly easy when the time comes to break open the glass and grab the canister.
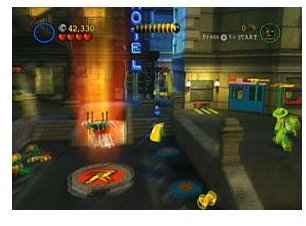
You can then free a woman in distress from her captor by smashing through the window. The street on the right hand side has been covered with a green toxic slime. You have to grapple hook to the catwalk that is just above and across the zipline. You will then have to fight more bad guys, and they might even have guns. Assemble the zipline, and grab the demolition suit straight across the way. This suit will help you plant bombs that you can manually detonate on a timer. The bombs can tear down large objects that are in the way, but not everything will come down because of the explosion.
Free Play: You might want to have someone with super strength lift the trash that is covering the manhole. You can then plant a bomb using the demolition suit to uncover the canister.
To move the truck that is blocking the pathway, set a bomb in front of it. There is another big truck blocking the way in the next alleyway that you need to go through so repeat the step again. The main road of this level leads to the entrance of the bank; it is one of the higher security levels of the game.
Free Play: You will want to grab two canisters on your way. With the help of a powerful character, you will be able to remove one of the two canisters that are wedged between cracks in the wall. This will then make way for a hidden passageway for you to follow through. You should come up to a room filled with toxic slime. You need a character that can withstand the slime, and remove the canister from one of the garages in the room.
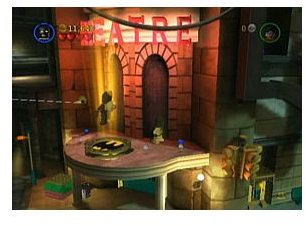
You will then want to grab the technology suit on your way. It rests in the center of the plaza; you can then run over to the glowing panel at the gate to summon a car. Jump in the car, and go to the smaller sized ramp that takes you inside the bank. Hit all three of the red panels on the wall. They should turn green and this will unlock the door in the back. Proceed to the opening to find Clayface and his friends trashing the place.
Free Play: Use the Attract Suit to feed the Attract Suit machine towards the back corner on the right hand side of the area before doing the bank scene. You will need 25 LEGOs and you will then go on destruction frenzy throughout the area. Once you have met the requirements from this then you will receive a Lego canister.
There will be another Demolition Suit around the corner. You should grab the last Lego canister in the room that resides in the telephone booth prior to switching suits. If you wound Clayface enough he will run to the back of the bank behind the metal gates. You will then want to wait until he starts hauling the vault out. You will then want to rest a bomb near the gate to blow it open, and a bomb on the silver container on the wall. This will allow you to obtain a red power brick.
Clay face now stands above a towering case, you can then see behind him to the three red security panels. Make sure to point the Batarang at Clayface and the three panels behind him. This will trigger the alarms and put an end to Clayface.
Second Chapter Moving Forward
A lot of the things to do in this portion requires you to come back to do them in free play. There is a suit changer for Robin in the alleyway. It is a Magnet Suit. Walk up the magnetic ramp and hit the lever on the right to drop the ladder for batman to get up. Move up the ladder, and cross the zipline. Assemble all of the Lego pieces to form yet another zipline to cross.
Free Play: Beware of the toxic slime at the bottom of the room, this usually grants instant death. Using a character who can withstand the toxic, have them walk through the slime to fix the equipment with Lego’s. Pull the lever to open a gate that is underwater and sink to the bottom to get the Lego canister.
To the far left of the area, you will want to assemble the crank and turn it to open the gate that is behind you. Put the car pieces together to drive to the suit changer. You can then power lift the dumpster out of your. Go inside and grab another Lego canister.
You will need to go onto the higher rooftop and grab Batman’s Glide Suit. You can then fly across the rooftops. Build the bridge for Robin once you’re across. Plant the seedlings once you come to the three rows of greenhouse plants and smash them. Once they are grown, this gives you access to a tractor. You can then mow down what you have planted. A Lego canister will then appear in the sky.
You will come across Catwoman in this level, and you can beat her a few times before she darts off again. You will want to follow her across the rooftops with the zipline. Use the two suit changers for both Batman and Robin. Build the car, and have Robin hack the control panel to control the vehicle. You will want to drive it through the glass enclosure. You will want to switch the red panels into the green panels. More stuff with emerge from the ground for Batman to blow up.
The pieces will come together to form a helicopter for you to use to reach the rooftop. You can then tip over the trash cans to put together two levers. Put the levers together and pull them down at the same time to open the door in the ground.
You can then follow Catwoman into the next level through another doorway into the next room. This allows you to fight during the next scene prior to moving forward. Once you hit her a few times, she will then lead you on a wild chase through the passages.