This point and click flash game includes some complicated puzzles that may frustrate even the most avid puzzle solver. This walkthrough helps the player get through some of the tricker puzzle locks on many of the doors of the Ravenhearst estate
An Introduction
Mystery Case Files Ravenhearst started out as a simple flash game. Ravenhearst made the transition to a desktop game. Ravenhearst started life as a flash game and made the transition to a PC cd. This point and click adventure does not have the same complexity of Frogware entertainment’s Sherlock Holmes games or the complexity of the recent Sam and Max Wii games.
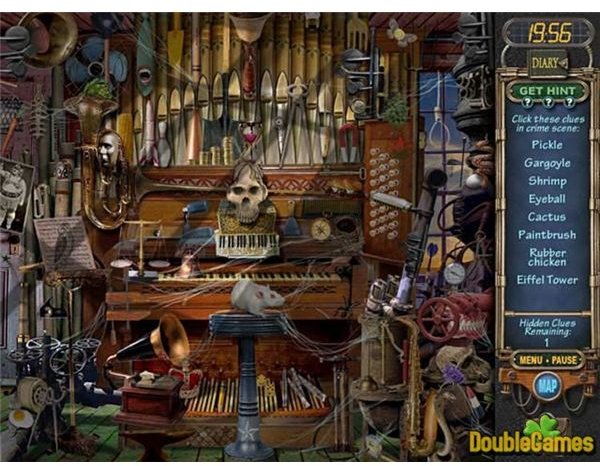
Jigsaw Puzzles
The game requires you to put together pictures from the diary pages that complete a picture. Use the same methods you would use to solve any other jigsaw puzzle. It would take too long to explain how to complete these puzzles .
The Parlor Lock
The Parlor lock puzzle is divided into day and night sections. The order of the pieces does not matter as long as you put them on the right side. Put the items related to day on the day side and put the items related to night time on the dark side. Do it correctly and the door opens.
The Servants’ Quarters
The daytime and night-time puzzle took little effort, but lock to the servants’ quarters requires more thought. Start the puzzle by clicking on the valve to the right of the clock. Set the clock hand of the clock so the time reads 9:30. Use the bottle opener on the cap of the purple bottle. Rotate the bottle until the liquid falls down into the next container. Light the flame under the container by moving the wind up car.
The heated water runs down the pipe and into the bathtub on the screen. Click on the top of the bicycle pump to inflate the balloon. When the balloon rises high enough, it reveals a valve. Click on the valve.
Guest Bathroom Puzzle
Start this puzzle by clicking on the Death tarot card. The card turns over to reveal a Z button. Press the Z button to reveal a fortune teller. Press the green button on the fortune teller to cause a nearby fish to move. Press the blue button and the fisherman will lower his pole. Keep pressing the button until the fisherman’s reel lowers his line until he catches the fish. Do this by pressing the green and blue buttons repeatedly. Catch the fish and throw it into the grinder. Press the yellow button on the grinder. The grinder then places the fish bones in the slot machine.
Play and win a game of Tic Ta Toe. Press the lever that gets revealed. If you lose the game, exit the scenario and start over. Pull the revealed lever to play the slot machine. Keep pressing the level until you get two fishes. A nickel drops from the slot machine. Click on the nickel and place it in the slot on the fortune teller. The machine gives you a paper key. Take the paper key and use it on the lock.
Music Room Puzzle
A few simple steps allow a player to progress through the game. Start this puzzle by pressing the red button marked on. Three orange dice appear on the screen. Three valves appear on the top of the screen. Press each valve a number of times equal to the number showing on each die. When you finish this sequence, the game shows a coin rolling into an elephant’s mouth. A new set of dice appear. Repeat this procedure until the horn reaches the bellows. When the horn is connected to the bellows, press down on the bellows. Three notes should appear on a paper below the door. Press the keys on the keyboard that correspond to the revealed notes.
Surveillance Room Lock
The surveillance room* puzzle involves completing an electrical circuit with a Venus fly trap. Look to the left of the fly trap to see the severed wire. Connect the wire to the hole. Flip the back switch on the wall. Watch the room fill with light. Turn the television on by pressing the orange button. Grab the pliers and use them to adjust the antenna and television tuner. You will see an image with a number on it. The screen shows a typewriter. Enter the number on the screen by pressing the corresponding keys on the typewriter. This releases the fly which then goes to the Venus fly trap.
*Note: The Ravenhearst game spells the word surveillance differently than the reader sees it spelled here.
Lock to the Library
This puzzle starts with a series of small and large clocks. Set the time of a large clock to the same time as its corresponding smaller clock. This reveals a picture. Find the opposite of the pictured object somewhere in the room and drop it in the empty slot behind the clock. A door closes over the empty slot. The door contains an object representing a certain number. Figure out the numbers each symbol represetns and type the numbers on the keypad in the proper order.,
Ravenhearst Attic Lock
Start this puzzle by looking at the device with symbols and Roman numerals on it. Ignore the Roman numerals and pay attention to the symbols. Locate the objects corresponding to these symbols in the room. Click on the gray arrow to rotate the items until the arrow revels a letter.
Locate the Buddha statue. Rotate the lettered blocks under the statue so that they face the same way that the revealed letters do. Wait until the water closet light begins to flash. Lower the toilet seat. Flush the toilet a few times until a Yodeler appears in the picture. Continue pressing the lever until the yodeler climbs the mountain. A hammer falls and triggers a sequence of events that unlocks the attic door.
The Storage Room Lock
Click on the paper with the one on it. Watch the animation of the man laying the egg. Find the 3 slot. Click on it until you see a spade card. Click on the two day sale sign until you find a penny.
The slot machine motif continues. Click on the first box of the slot machine until an egg appears. Make sure the second box shows the penny, and the third box shows a spade. This combination causes a mouse to appear. Find the piece of paper that says feed me. Remove it uncover the mouse hole. Open the cupboard. Take out a can opener and a can.. Use the can opener to open the can. Click the can twice until it points down
Find the magnet and use it on the lid of the can. The lid attaches to the magnet. Move the food to the waiting plate. Click on the cat The mouse comes out of its hole, eats the food and runs on its wheel. The mouse wheel mechanism opens the door.
The Shed Lock
Click the turquoise can and watch a fly pop out of it. Click the amber colored bottle on the top shelf and remove the cork to release the second fly. Rotate the yellow can on its side and watch the third fly come out. Move each fly onto the glowing turquoise area. This completes the circuit and starts a horse racing game. Look for a black button on a blank number dial. Press the button until the dial points to 35. Watch a piggy bank fall from the ceiling. Click on the piggy bankto get a nickel. Drag the nickel to the appropriate slot on the horse racing game. Select one of the colored buttons. Pressing the button places a bet on that color horse. Play the game until the horse you pick does win. You can take nickels from the bank indefinitely.
Ravenhearst Estate Cellar Lock
The lock for the cellar starts with a grid of light bulbs. Click the light in the upper right corner first. Turn on the light in the lower right corner next. Click the light on the lower left and upper left corners on. Four lights should remain unlit. These lights go in the a diagonal pattern from the top left to the bottom right. Click these in order from the top down.
Use the crank below it until a battery pops out when the green light come on.. Place the battery in the appropriate slot. The lights now turn off. Click on the four corners in order then the light in the middle. Click the light to get the red battery.
The light grid resets itself yet again. Click the light in the middle, click the light above it and click the light below it. Turn the crank to earn a purple battery and put it in i slot. The grid of lights resets again. Click the bulbs in each of the four corners. Then click the bulbs that still do not shine in each corner diagonally. Turn the crank and get the purple battery.
Place the battery in its slot and beat the three video games that appear there. Get the key when the game over screen appears. Open it and proceed to the next set of rooms.
Unlocking the Greenhouse Gate
Complete the first step of the greenhouse gate puzzle by putting the pictures of a frog’s life cycle in the correct order. Find the water pump switch in the lower left corner of the screen. Click it until some water comes out of the nearby hose. The first step yielded a roll of duct tape. Use the duct tape to fix the leak in the hose.
Find the switch below the flower pot on the left. Flip the switch until it turns yellow. Flip the switch underneath the right flower pot until it turns blue. Rotate the dial on the pump until nozzles extend over all the flowers. Repeat the process for the dial containing water. Use the dials to give food and water to all the plants in the greenhouse. Take the petals off the plants until the petals match those on the picture.
Ravenhearst Nursery Lock
Click on the button. The button reveals a series of items in sequence. Click on the items in the correct order Repeat this process several times until the lock opens. This is a simple task that requires a good memory
Guest Quaerters Lock
Start the guest quarters room lock puzzle by clicking on the apple. Click the battery next to it. Place it in the battery receptacle on the screen. Click on the pistol. Rotate the pistol until it points at the apple. The gun fires automatically The bullet breaks pieces off of the apple and reveals symbols on the inside of the fruit. Write the symbols down and use the keypad to enter the symbols. When you finish this press the green button and a boot appears behind a chicken.
Press the button on the toaster. When the button rises a card with another symbol pops out of the toaster. Turn your attention towards the counter and note the wooden ruler. Move the arrow to the 3.5 inch mark and hit the red button. Three bottles lower from the ceiling. There are levers to the left. Move the levers to pour the contents in the proper order.
Feed Creation
2 Doses from from the Diamonds Jar
3 Doses from the Spades Jar
2 doses from the moon jar
Click the lever beside the mixer to create some chicken feed. Use the keys to turn the crank by the boot. Click on the boot and the boot kicks the chicken. The chicken then lays an egg. Use 2 doses from the diamond jar and 1 dose from the spade and moon jar. Repeat this process until you have four eggs. Change the colors in each window to match the colors of the egg. Pull the lever on the far right.
Ravenhearst Workshop Lock
The workshop lock starts with a slider puzzle. Solve the slider puzzle and a receive a battery as a reward. Pick up the battery and place it into the appropriate slot. Turn the fan on. Press the white button twice. This moves the fan to the bottom of the screen. Press the panel labeled number 03. This reveals a red button that you need to press. After you do this, a red ball drops into the fan, bounces off of it and breaks a Santa egg. Get the battery that was in the egg. Set the dial on the right voltage meter to 8. Move the right dial to 3. Take the pick from the guitar and strum its strings. The guitar music startles a monkey. Take the card the monkey reveals from the amplifier.
The Final Door
Look at the symbols on the keys and place the key in the hole with the appropriate symbol. Turn the key until a letter is revealed. Press the red button for the appropriate key. That button should turn green. Move the rotating dial at the bottom of the screen to the correct letter. Complete the password to open the door.