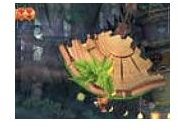
We’ve reached world three, an ancient collection of ruins and puzzles hidden deep in the jungle. This walkthrough covers the first level of the Ruins World. Keep reading for more Donkey Kong Country Returns tips and tricks!
Overview of World Three
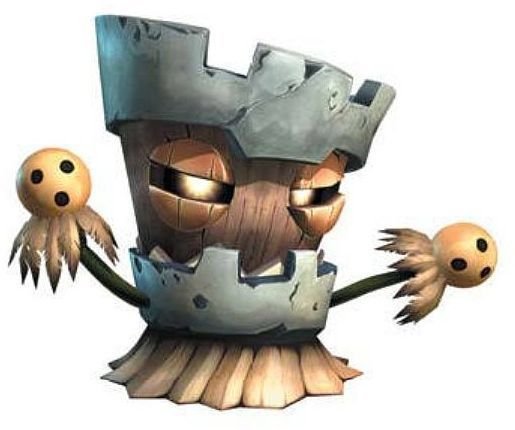
In this world, ancient ruins and puzzles abound. Many times, you’ll need to assess the situation and find the secret to passing through new obstacles. The enemies here are mostly small birds that sometimes walk on stilts, Tikis of all sorts, and the Biters – Little round blue creatures that hide in the ruins and jump out to chase you.
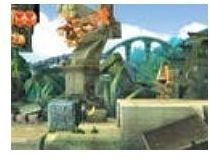
Level 3-1: Wonky Waterway
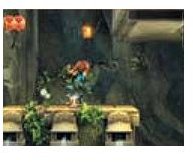
As soon as you start the level, there is a DK barrel to your right. Break Diddy Kong out of the barrel if you need him, and go to the left. There is a large gap you can either hover across with Diddy Kong’s help, or roll and jump across, whichever is easier for you. You’ll land on a small pier with a Tiki pacing back and forth, and the level’s first puzzle piece above. Collect the puzzle piece and go back to the right. Soon you’ll encounter a tall bird, it’s actually walking on some short stilts. Roll through it or jump high enough to land on top of it and it will lose its stilts, and rolling through or jumping on it again will defeat it for good. These birds will run towards you faster when they are off of their stilts.
As you continue forward, you’ll see a sequence of five or six Tikis, some flying up and down, and some walking along the ground. Try to jump on each of them consecutively to get a few banana coins. Whether you bounce all the way to the end on them or not, pay attention to the very last Tiki, you have to use it to reach the letter K above the DK plate in front of the ancient stone walls. After you jump off the last Tiki and collect the letter K, there is nothing else important out here, so pound down the DK plate to make the walls drop, and go inside.
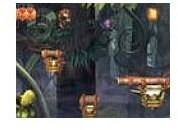
The Ruins
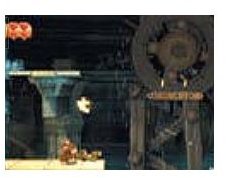
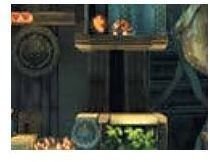
When you leave the walls, you’ll notice you’re no longer by the ocean, but in a dense jungle with ruins lining the background. When you jump across onto the statue head where a blue Tiki is launching blue fireballs to its sides, wait for it to launch two very close to each other, and jump over them. After this kind of Tiki launches two blue fireballs, it will not attack for a while. Crouch down next to it and blow on it to put out the flames, and then jump on it to defeat it. Ahead, you’ll see two sleeping pillars. When you get close to them, they’ll wake up and fall down. Stay away from them as they fall. Blow on the three candles in the area between the fallen pillars and a vine switch will hang down. Jump up and hold on to it (the same way you hold on to grassy walls) to reveal some collectibles, including the second puzzle piece.
Continue going right, and you’ll see a small area below you with another blue Tiki in it. Getting rid of the Tiki will make this next part easier. Jump up and hold on to the vine switch on the right, and a platform will slide out from the wall. Use the wall to reach the grassy ceiling above you, and climb over to the left first to find a bonus area barrel. In this area, collect all the items around the platforms before time runs out and you’ll be awarded the third puzzle piece. When you get back outside, you’ll have to pull the vine switch to slide the platform out again, and the blue Tiki will be there again. This time, when you cling on to the grass above you, go right, and at the top of the wall you’ll find the letter O. Jump down and cross the level checkpoint.
The Waterway
Right next to the level checkpoint you’ll see a DK barrel. Further ahead, you’ll see three sleeping statues. Run and jump across the areas in front of the statues quickly, and wait on the right. After they have fallen, jump back over to the second statue and pound through it to find the fourth puzzle piece. Next, you’ll see the fifth puzzle piece in a gap in the ground, jump down and collect it. Don’t pull on the vine switch first or the puzzle piece will be blocked off. There is actually solid ground at the bottom of this gap, although you won’t see it until you jump down to collect the puzzle piece.Now, jump up and grab the vine switch to your left to lower the bridge across the gap so you can get across. Two regular birds and one bird on stilts will run across. If you can bounce on all of them consecutively (one bounce for both normal birds and two for the bird on stilts) you’ll receive two banana coins.
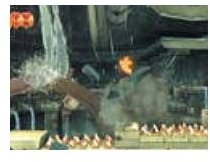
Jump into the blast barrel and you’ll go over to some crumbling platforms, the tilting platforms will fall towards the direction they’re tilting when you touch them, and the flat platforms will crumble when you touch them. Flying Tikis will be patrolling the area too, take as much time as you need to avoid them without letting the platform beneath you completely crumble. The letter N is above one of these platforms. Once you reach the end of the first series of platforms, you’ll have to jump into another blast barrel and go into the background and follow another series of crumbling platforms to the left. When you reach the far left, another barrel will take you to the furthest back platforms, where you will go right again. At the end of these platforms, a blast barrel will take you back to the main level, where another level checkpoint is.
Nearing The Ancient Waterway’s End
Next to this level checkpoint is another DK barrel. Jump up and grab the vine switch to make the statue’s mouth to your right open up. Some collectibles will be inside, but try to collect them quickly and exit the mouth to the right before it slams shut.
There is a banana bunch above the statue you just exited, if you’re curious above reaching it you can jump high off of one of the birds to the right. Blow on the three candles in the area where the two birds are to make another vine switch drop, grab the vine switch to make eight bananas and two banana coins appear.
There is a lower ledge to your right where a blue Tiki is, if you get rid of it it’s safer to collect the sixth puzzle piece by pounding in front of the metal container. To the right you’ll see some more sleeping statues, after they wake up and fall, pound through the first two to get the letter G.
The next area is another great spot to get more coins. The ground slopes down here, and there are quite a few Tikis hovering up and down here. Jump across all of them and you’ll get six coins. The level end barrel is here, but don’t jump up into it yet. Roll and jump or hover jump across the gap to the right and you’ll reach a stone area with two Tikis. Grab the vine switch above you to reveal the seventh puzzle piece. Jump back across the the left, where the level end barrel. Here’s an extra, look at the background here and you’ll see a statue of the original Donkey Kong on a mountain. Now jump into the level end barrel and you’re done the level.
Level 3-2: Button Bash
When you start the level, you’ll see a DK barrel to the right. Break it open if you need Diddy Kong. Go back to the left, under the statue part that’s being held up by a few pieces of wood. While you are under it, pound and then run or roll quickly out of the way to the right as it falls down. Now you can collect the first puzzle piece that was behind it.
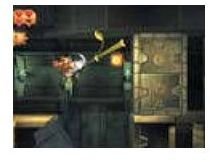
Go right again, and jump into the blast barrel. It will point up and lock. Blast into the barrel above you. It will face right, and a stone monkey head will open its mouth. Blast into the opening. You’ll land in front of a bird on stilts, roll through it twice to clear off this platform, then go left and pound the ground in front of the yellow plant to find the second puzzle piece. At the right side of the platform, pound the orange block three times to reveal three blast barrels to your right.
Jump in the first blast barrel and it will automatically shoot you straight up. Go right just a little bit and land in the second barrel. When the second barrel fires you, go left and grab onto the grassy ceiling. Go left and you’ll find the third puzzle piece. If you keep clinging to the grass, you can go back to the right and climb around the corner, stopping just beneath the spikes, and jump from there to the third blast barrel. The third blast barrel will again launch you straight up, and you can land on the platform to the right.
The Puzzles Begin
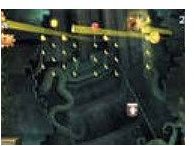
On this platform, jump high off the Tiki to collect the letter K. Jumping on this kind of Tiki won’t get rid of it, but after you get the letter K, disregard the Tiki and jump into the blast barrel on the right. The barrel will start rotating to fixed positions, one diagonally up and left, one straight up, and one diagonally up and right. Wait until it’s facing up, towards the red button, and launch up. You’ll hit the button and bounce back into the cannon while the spiked wall to your right moves out of the way. Now, launch diagonally up and right onto the platform. The wall will rise behind you and start moving towards you, but it won’t hurt you to touch it.
Soon you’ll be in an enclosed area, and the wall on your left will stop. Stand near the center of the screen. Tiny hummingbirds will start flying from the left and right sides of the screen at you. If they miss you, they’ll stop for a second and start flying again in your direction. If you have Diddy Kong here, keep rolling back and forth through the birds, only stopping to turn around if you’re in a safe spot. You can also jump on the birds if you’re careful. If you see one stop beneath the floor, stand above it and you’ll defeat it as it flies up.
After you defeat all of the hummingbirds (there’s about six), jump into the barrel that appears about you. This barrel and the one across from it will orbit around a center line of five red lights. Wait until the barrels are lined up along the line of red lights and launch across them. The barrels will stop moving and fire instantly when you launch, so you won’t have to worry about launching before you reach the lights. Once you done this three times, a barrel will appear in the center. Launch into it and it will fire you into the area below. There will be two Tikis to your right. There is a dandelion where the Tikis are, blow on it to receive a heart.
Barrel Mazes
Jump into the next blast barrel on your right. Now you’ll go through a small blast barrel obstacle course, much like the ones in the classic Donkey Kong Country games. Wait until the spinning Tiki is out of the way and launch into the next barrel. Some of these barrels (including this one) will start snapping to different positions automatically. The small red dots are indicators of what locations they can point to.
Fire to the upper-left to hit the switch, and a barrel will upper to your lower-right. Fire down to the new barrel. It will slide up along a pillar, launch out when it is as far up as it gets. Launch up and right. The next barrel shoots you down and right. This last barrel will move up and down, fire right when it is all the way down to enter a bonus area.
This bonus area is very fitting for the level you’re in. Launch back and forth between the two barrels on either side of the room to collect items while avoiding the auto-launch barrel in the center. If you succeed within the time limit, you get the fourth puzzle piece. When you leave the bonus area, you’ll see the letter O above you. Wait for the bird on stilts to come towards you from the right, and jump high off of it to collect the letter. Now, go right and pound the DK plate all the way. The wall behind you will be blown out of the way, and a blast barrel will appear above you. Jump into the blast barrel and fire into the background where an auto-launch barrel sits. You’ll end up in front of a level checkpoint and the screen will zoom in to your location.
Hit the Switches
To your right, you’ll find a DK barrel surrounded by two Tikis. Once again, these are the kind that can’t be defeated by a jump, but you can use them to bounce up to the grassy ceiling above you. Climb up the grassy wall to the left and pound in front of the plant (while still clinging to the grass) to reveal a blast barrel that takes you to a bonus area. In this area, launch up out of the barrel as it moves back and forth to collect all the items. Collecting all the items within the time limit will win you the fifth puzzle piece.
When you leave the bonus area, jump back up to the grassy ceiling. This time, climb up and to the right. When you reach the end of the grass, wait for a barrel to come along below you, and drop into it. The barrel will go right, and a barrel will be above you. Launch up into it. This barrel will also go left and right, but above you will be four switches. Fire up into each switch.
After a switch has been hit, it will flip around and reveal spikes. After all four switches have been hit, the ceiling will be cleared and you can cling on to the grass above you. Go right and drop down. There will be a plant here with a heart inside, but in this area is a flaming Tiki. Blow on it first and then roll through it to defeat it safely. On the right, beyond another flaming Tiki, climb down the round grassy area to find the sixth puzzle piece, and then climb up the grassy wall above the second flaming Tiki. Jump over into the blast barrel and hit the switch on the right to flip the wall around on your left, replacing the spikes with grass.
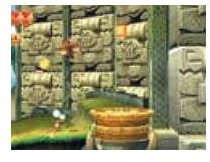
Blast Barrels and Surprise Platforms
Climb up the grass further. Drop down at the top and slide down the incline. You’ll now be in front of a network of blast barrels, be careful with your timing and launch upper-right, upper-right, upper-right, lower-right, upper-right and hit a switch, lower-right, upper-right and collect the letter N, upper-left, upper-left and lower left. This barrel will start sliding back and forth, launch when you are lined up with the banana coin and you’ll reach the next barrel. This next barrel will slide in the same way, launch to the next barrel. Launch to the lower-right into the last barrel, and you’ll end up in front of the second level checkpoint.
Beyond the level checkpoint, you’ll find an area with four birds running back and forth. Eliminate all the birds and part of the floor will rise. Pound it a few times to activate the wall behind you. The circular areas will take turns spinning and then lifting to make platforms and then dropping. Although the order they activate looks random, the same order will reset after the platforms have appeared and disappeared four times. Wait for the bottom-center wheel to spin, and jump up to land on the platform when it appears a moment later. From here, the upper-left platform will appear next. Then, once again, the upper-left platform. Next is upper-right, and upper-right again, where you will find the letter G. To get the last puzzle piece, jump down to the third platform from the top, down the left side, since it appears next. Jump upper-right, upper-left, and then jump to the platform to your left. Walk into the wall and you’ll find the seventh puzzle piece. If at any point you fall down to the floor, wait for the bottom center platform to spin and continue the pattern over again.
The Monkey Statue
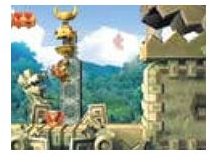
When you’re ready to go back to the right, wait until the first platform in front of you rotates and rises. Next, two platforms to the right, one row down, will rotate and rise. Jump to one of them. Finally, the platform at the upper-right corner of the wall will rotate and rise, jump to it and reach the blast barrel. The barrels will launch you around a giant monkey statue. At the top, launch into the open monkey’s mouth. The statue’s head will spin around quickly, and you will be launched back out into the barrel in front of the statue.
The head will continue spinning slowly. The mouth you fired into is now closed, and there are two open mouths left. If try to fire into one of the mouths and miss, you’ll drop down into one of three barrels that will return you to the barrel aiming at the statue head, but each of the three barrels will be used up as they return you. In other words, you have a maximum of three misses before the return barrels will be gone and you’ll fall off the screen if you miss again. Remember to fire the blast barrel before the mouth rotates towards you or you could hit the statue after the mouth has already passed. After all three mouths have closed, the statue will break open and the level end barrel appears above you. Fire up into it and you are finally done this barrel filled level.
Levels 3 and 4 are explained in the next page…
Level 3-3: Mast Blast
As soon as you start this level, you’ll see a DK barrel to your right. Use it if you need to, and jump into the blast barrel. It will take you to a stone platform in the background. Avoid the flaming Tiki and slide down the slope behind it. There are three small platforms after the slope, and the left and right platforms have a Tiki on them. Past the platforms is an upwards slope, jumping up the slope will be faster than walking up it. At the top is another blast barrel that will take you further into the background where another stone platform is. There will be a flaming Tiki just to your right, blow on it and jump it to give yourself more room here.
Go back to the left. You’ll go down a short slope and see a dandelion on a small platform. Stand at the edge of your platform and blow on the dandelion across the gap, and you’ll get the first puzzle piece. Go back to the right and you’ll have another slope to slide down. Watch for the letter K above you as you jump across the first gap, then the slope will level off slightly and you’ll encounter a Tiki. The platform slopes down again and ends in front of a blast barrel. Jump inside and you’ll be launched to a short slope in the foreground before jumping in another blast barrel. This one launches you to a slope in the background leading to one more blast barrel, which finally takes you out of the jungle and back to the beach.
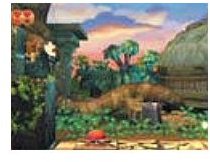
Return to the Beach
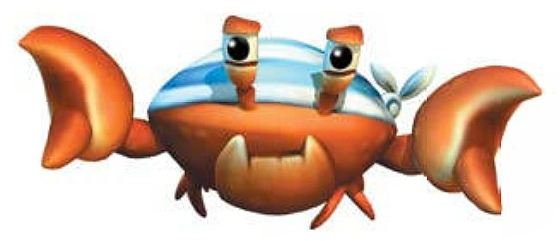
As soon as you land on the beach, you’ll activate the first level checkpoint. Some orange crabs will appear from the right and start walking towards you. Walk slowly to the left while letting one follow you, and you’ll find a stack of three crates. Jump high off the crab and land on the crates. Pound through all three to find the second puzzle piece. Go back to the right, you’ll see a few more orange crabs and a crate over the third puzzle piece. Pound through the crate to get the puzzle piece.
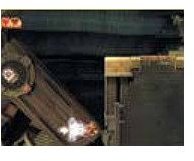
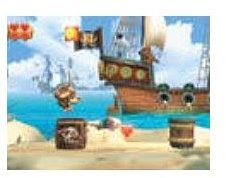
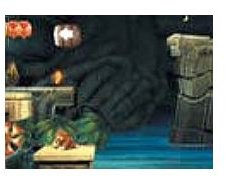
Beyond this crate is a red crab, a gap full of spikes and a small crate with a skull-like symbol painted on. These kinds of crates are explosive, don’t pound them or you’ll end up taking damage. In the background, a pirate ship is firing cannonballs towards the shore, aiming wherever you happen to be when they fire. Jump onto the crate and quickly collect the letter O above it before a cannonball destroys the crate. There is a heart to the right of the crate.
Jump off the wooden post to reach the top of the crates. Pound through the two non-explosive crates to get another heart. Run up a short slope past two crabs until you find two more explosive crates, stacked on each other, above a blast barrel. Stand on the crates long enough to make a cannonball fire towards you, and move out of the way. The top crate will be destroyed. Repeat for the second crate. If you still need another heart, go to the right and you’ll find one next to a red crab. When you’re ready to continue, drop down into the blast barrel.
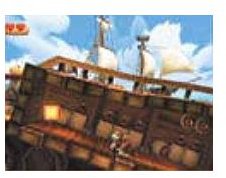
The Pirate Fleet
The blast barrel will launch you into the ship’s hull. Roll left into the red wall several times to break it open. Four orange crabs are beyond the wall, you can bounce low off of all of them to get an award of two banana coins. Jump over a few more crates until you reach another red wall. The crate in front of this wall contains a heart. Roll into this wall a few more times and it will swing upwards, and can be used to go higher.
When you reach the area above you, keep going left, but watch for loose cannonballs that come rolling towards you. You can pound in front of the three cannons along the wall for a few bananas or coins. Jump on the swinging platform, and use it to reach the ship’s deck. There are two cannons you can pound in front of to fire cannonballs towards the ship in the background, but they won’t hit it. They will give you a few more bananas, though. Don’t drop into any of the gaps in the deck, and keep going right.
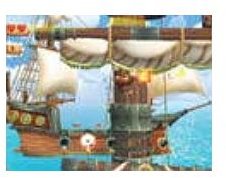
Reaching the Second Ship
Roll into the next red wall a few times and it will give way, making the mast behind it topple as well. Jump to the higher platform and avoid a few crabs until you reach a red door in the floor, directly to the left of the second level checkpoint. Pound through the door, drop through and go left to pick up the letter N. Head right again, and jump into the blast barrel at the end of the ship after passing the level checkpoint. The barrel will shoot you towards the next closest ship in the background, and you’ll land on a crab pirate captain.
The ship that’s the furthest away will pull alongside and start firing cannonballs at your location as you explore this ship. Before you can continue, you’ll have to roll into the wheel to your right a few times to break it down. Be careful as you continue, not only are there cannonballs raining down from the other ship, there are a few crabs scattered around the ship you are on. Go right and drop down to the lower part of the deck. There are two crates next to each other down here, the one on the left contains a heart. If you don’t need it, save it for later.
Pirate Ship Battle
Go a little further right and stand on the explosive crates to get cannonballs to fire towards them, and jump out of the way when they are about to be hit. Below them is a bonus area. Before going down, take note of the lone crate to your right, it contains another heart. Now, enter the bonus area, and collect all of the items before the time runs out to win the fourth puzzle piece. You’ll exit at a door next to that second heart. Go back to the left and climb back up to where the wheel you broke was, jump over and cling to the grass hanging from the mast on your right.
Drop into the blast barrel on the right. It will launch you to a mast part that rotates down when you stand on one end. Stand on the left side to make the right side raise, and jump up from the right side to collect the letter G. If you jump off the right side to reach a higher deck of the ship, where two explosive crates are, you can find another heart here when the crates are broken open by cannonballs.
To the Top of the Masts
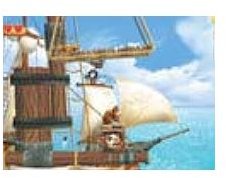
Climb up to where you were before, and raise the left side of the tilting mast part so you can climb up to the left mast. Before you jump in the barrel on the left, roll off and jump as far as you can to reach the higher deck platform where you find the fifth puzzle piece. Now, get back to where you were, and use the barrel to go to the top of the masts. A cannonball will hit the mast, making it topple while bringing down some more useful platforms.
Ignore the tilting platform for now and go to a slightly lower platform on the right. Let a cannonball hit the explosive crate here to get the sixth puzzle piece. Climb back up to where you were, and tilt the platform by standing on the side of it. Use the height of the right side to get to the swinging platforms to the right. Roll-jump off the right side of the second swinging platform to land on a higher deck platform, where the seventh and last puzzle piece is. Once again, climb back up to where you were. Jump to the hanging vine from the second swinging platform, climb to the top and jump into the blast barrel. Your ship will fall apart and wreck the ship in the background with its mast, leaving you on a piece of floating debris under the level end barrel.
Level 3-4: Damp Dungeon
This is a level that can only be opened if you buy the key for this world in Cranky Kong’s shop. After starting the level, go right. Soon you’ll see a red bird crawling along the ground. Directly after it will be a waterwheel with platforms attached to it that stay level as it turns. Jump down from here to the small platform with the DK barrel, pick it up and carry it with you onto the next waterwheel.
There is a blue flaming Tiki at the center of this wheel, it’s not necessary to eliminate it, but try to avoid its blue flames as you go around or you’ll lose the barrel. As the platform you jump on rotates up and to the right, a shark will be jumping out of the water under you. Stand to the left side of the platform or jump to avoid it. When you reach the upper right area of the wheel, you’ll see a bag hanging to your right. Jump into it with your barrel and it will drop the first puzzle piece.
There are two more red birds on the long platform below you. At the end of the platform is a container you can pound in front of to receive a heart. Jump up and cling to the grassy ceiling and go right. Avoid the two sharks and drop down between them to collect the letter K. Jump back up quickly, the platform will collapse. Once you reach the other side, pound on the wide panel on the ground a few times to break through and find the second puzzle piece.
More Waterwheels and the Coin Area
Next you’ll see a small platform where bird with stilts wa
lks. If you bounce off of it quickly you can jump up and grab an extra life balloon. Jump from here to the waterwheel, and avoid the blue flaming Tiki in the center. One of the platforms on this wheel has a heart on it. After the wheel, you’ll see two platforms to your right. Drop to the larger platform on the bottom and pound in front of the container to find the third puzzle piece. Climb back on the wheel to your left and get back to the platform above you where a statue falls. Jump from there to a small waterwheel.
The next platform has another falling statue, but after this one falls, pound through the statue to find the fourth puzzle piece. In the center of the next waterwheel is the letter O, and then a final platform with a falling statue behind it. This platform has a heart on it.
The wheel beyond this platform is spinning very fast. Drop down beneath it and blow on the dandelion to find the fifth puzzle piece. You don’t really need the barrel that’s down here for anything. Jump up on one of the fast moving platforms and reach the area to your right. This place is great for collecting coins. If you can collect all the coins midair while jumping across each bird, you’ll get plenty of coins and even an extra life from the last bird.
The level checkpoint is on the next platform. After the checkpoint, drop down and climb across the grass on the bottom of the platform to your right. You’ll find a bonus area. Bounce off the moving platform in the center to collect all of the spinning items above you within the time limit, and you’ll get the sixth puzzle piece. When you leave, you can find a DK barrel on a small platform near the top of the screen. Use it if you need to then keep going right.
Deeper Into the Dungeon
On a platform below you, you’ll see a bird on stilts. Beyond it is another lower platform with a fan to its left. Reach that platform and blow on the fan until it stops turning and locks in place. Behind you you’ll see a platform has risen in the background. Jump up into the blast barrel above you, and as soon as you land in the background, roll and jump to the left where the new platform is. You’ll see the seventh puzzle piece waiting for you. The platforms to your right have all crumbled, so pound in front of the container on this platform and a blast barrel will come out that will take you all the way to the right.
In this next area, there are a few large wheels with three platforms on each. The wheels alternate which direction they turn as water pours down their left and right sides. There are also a few sharks that jump up at the sides. Pick up the barrel from the second wheel, and carry jump through the bag hanging down on the right to get the eighth puzzle piece. If you drop it, there’s another barrel on a small platform above the walkway before these wheels, but you’ll have to carry it further. One of the platforms on the second wheel has a heart on it. The third giant waterwheel has a flaming Tiki in the center. If you’re on the third platform when the wheel rotates to the right, you’ll be at the top where you can jump to the right and collect the letter N before landing in the blast barrel.
Nearing the End
The blast barrel will take you back to the foreground. Soon you’ll see a grassy ceiling above you. The container at the end of your platform will have a heart inside. Jump up from there, cling to the ceiling, and make your way right. As you approach the letter G, you’ll see a bird on stilts heading your way. The ceiling here has gone down a little, so you should go back and wait for the bird to go under you. When you collect the letter G, drop down and pound through the panel to find a bonus area. Collect all the items within the time limit by shooting between the barrels, and you’ll be awarded the ninth puzzle piece.
After you leave, jump back up and cling to the ceiling. When you reach the end of the grass, drop down and make your way further right, past two red birds. You’ll see one final waterwheel, with a gigantic shark after it. Wait until the shark is out of the way, and jump into the level end barrel to finish the level.
Level 3-5: Itty Bitty Biters
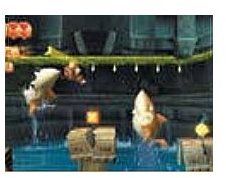
After starting the level, go left until you reach the wall. There will be a grassy surface on the wall, climb up it and jump into the blast barrel to find a bonus area. Collect all of the items in this room within the time limit, and you’ll get the first puzzle piece. After you leave, go right until you find a large statue head. Jump up and pull down the vine switch to open the statue’s mouth, and go inside. Soon you’ll see a DK barrel, break it open if you need Diddy Kong.
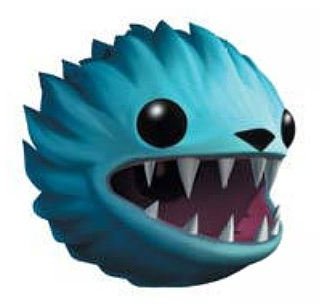
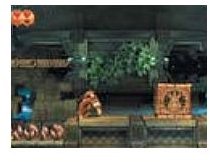
As you make your way forward, you may see some small blue creatures peeking out at you from the floor for a second before hiding again. These creatures are called Toothberries, and they will be your main foe throughout this level. They won’t come out to attack just yet though, keep going forward and jump across a few pits full of spikes, and collect a few bananas along the path, until you reach a big, open room with a flat floor. A Toothberry will pop out of the floor on either side of you. You can defeat blue Toothberries by jumping on them once.
Ahead of you are a few more Toothberries. Along the ground are more spikes here and there, but be careful of the Toothberries above you on platforms while climbing over the spikes. Next you’ll find a low area with a blue Toothberry stuck in a little cage. It’s called a Cageberry. You can’t defeat them, but you can use them to reach high places. Roll into the side of it or pound the ground next to it to flip it over, and then pound on the top. It will compress, and launch you into the air. Grab onto the vine switch above you to open the path ahead, and jump off to the left to get the letter K. The statue on the right in the background has a heart, pound in front of it.
Infested Ruins
Now that you’re done in that area, keep going right. You’ll find a few platforms with blue Toothberries hopping around on them. Climb to the top platform, and jump into the wall on the left to find the second puzzle piece. Next, you’ll find another DK barrel on a ledge. Behind it, two blue Toothberries will jump out from the wall on either side of you. On the platform below you and to the right, you’ll see a red Toothberry, it’s bigger and will take two jumps (or one roll) to get rid of. It will jump up to the platform where the DK barrel is.
Now you’ll see another Cageberry, flip it over and spring up to the blast barrel above it. It’s a bonus area. Collect all of the items on the moving platforms in time, and you’ll win the third puzzle piece. When you leave, pound the statue that you appear in front of to find a heart.
You didn’t miss anything important to the left, so keep going right over the small platforms. A few blue Toothberries will hop out onto some of the platforms. Under the last platform, you’ll see the letter O. Stand on the ground to the right, and roll out under the O. Jump up (you can jump after rolling even if you’re in open air) through the O and land on the platform above it. Make sure to back up a little when you jump or you’ll overshoot the platform and fall down. Use the Cageberry to your right to reach the platform above you, where a few blue Toothberries are. The space under you is a secret wall, climb down to the right and walk left into the wall to find the fourth puzzle piece. To your right is the level checkpoint.
Toothberry Challenges
On the next two platforms, blue and red Toothberrys will hop out. After that, you’ll see a stack of five yellow Toothberries. They will

hop slowly forward. If you get close, they’ll stop and lean back. Stay close to them until they open their mouths, and then run left as they topple over where you were. Once they topple, jump off of all of them while they’re stuck on the ground. They can’t get back up. Don’t try to roll through them, they are resistant whether they’re standing up or toppled. You’ll find another Toothberry stack next, and you’ll see a heart beyond them. At the third Toothberry stack, jump high off of one of the Toothberries after they topple to collect the letter N above.
Jump across two small wooden platforms and reach the area with another Cageberry. Flip this one over when it is to the left or right of its platform, but don’t pound it. Instead, stand on top and blow out the nearest candle. Wait for the Cageberry to recover and do the same when it reaches the other side of the platform. The fifth puzzle piece will come out from the wall behind you. If you don’t have Diddy Kong, go to the right and get him from the barrel. Spring off of the Cageberry, hover to the left and go inside the wall to find the sixth puzzle piece.
The Way Out
In the next area, you’ll see about five Toothberry statues in the background. When you get to the center one, the two statues to your left and right will break open into Toothberries. Wait until one almost reaches you, and jump high off of it to reach the letter G above you. Now, keep going right. The candle on the new platform after you jump over the gap will give you a heart if you blow it out. Afterwards, you’ll find a big chamber with a few platforms. Blue Toothberries will start hopping out, if you defeat all all of them a blast barrel will appear. Hop into it and it will launch you through the floor below you.
You’ll now be in a similar chamber, but red Toothberries will hop out of the wall. Remember that they take two hits to defeat. There is a DK barrel down here if you need it. Stand on one of the platforms over near one of the walls and all of the red Toothberries will come to you. You will be able to bounce off of most of them with the wall helping to keep them in place. You can also roll through them if you get cornered. Also, the areas under the platforms and up against the walls are safe, since the creatures will always jump to the platform above before they can reach you. After defeating them all, another blast barrel will appear and take you to the surface of the ruins.
Pound on the patch of cracked ground to your left to find a small mushroom, it will help you bounce up to a dandelion on the left. Blow on the dandelion to find the seventh puzzle piece. To the right is a DK plate, but you can’t pound it because its covered in leaves. Blow the leaves off and pound the DK plate a few times. The level end barrel will appear, jump into it and claim your prize!
Level 3-6: Temple Topple
Rambi makes a comeback in this level, and is a great help whenever you need to break through a wall or quickly charge through enemies. He can also help you get to some of the KONG letters in puzzle pieces in this level.
To the left of the starting area, there is a block with Rambi’s face on it. You can’t break it open yet, so go right. Soon you’ll jump up to a ledge with a DK barrel. Break it open if you need Diddy Kong. To your right there is a frog heading your way. Ignore it and hop on the platforms to the left. The second platform will have an armored Tiki. Jump into the blast barrel on the left, and it will launch you along a path that will take you to the first puzzle piece. After you land, continue right, and watch out for gaps full of spikes and armored Tikis. The armored Tikis are good for bouncing off of, so when you find one walking in a patch of spikes, bounce off its head to cross the gap safely. After seeing a platform with bananas over another gap of spikes, you’ll find Rambi the Rhino’s box. Break is open, climb on and go back left where you came from. Remember that Rambi will break spikes that he walks on, and defeat most enemies that he runs through or jumps on.
As you’re going left, stop in the first spike pit (under the platform that had bananas above it) and pound through the lighter-colored panel on the left to find the letter K. When you reach the area you started in, run through the blocks in the wall on the left to find the second puzzle piece, then continue going right again. After you pass by the spot where you got Rambi out of his crate, you’ll see more pits full of spikes and hanging stone objects with Rhinos carved into them. You can break all of them by running through them with Rambi.
Breakables for Rambi
Next you’ll reach a wall made out of blocks. Run through it with Rambi and they’ll crumble. Once you start going down a wooden plank incline, you’ll see a flaming ring above you. If you jump through the center of these, you be rewarded with bananas or other collectibles. If Rambi touches the ring while jumping through, however, he will run off and you’ll have to catch him again. You can jump through without Rambi and still collect the reward, but it’s not necessary, and it’s actually safer with Rambi, because he functions almost as a renewable extra heart. At the bottom of the walkway, you’ll see another block wall in front of you. Jump into it with Rambi and keep going on to the next platform because the first will collapse.
While you’re on the platform after the collapsing one, you’ll see the letter O to the right, jump out and grab it before falling down. The block that it’s up against might move a little if you bump up into it, but there isn’t any way to knock it over. You’ll fall through some breakable blocks. After you land, go through a couple blocks to your right until you’re standing over a tile with an open area beneath it. Pound through the tile to find a bonus area in the wall to the right.
In this bonus area you’ll have to bounce off of the moving platform on the bottom to collect the bananas and coins flying around the center. Collect all of them within the time limit, and the third puzzle piece is yours. When you exit, you’ll be in an area similar to where you were before, with breakable blocks to your right, but it’s actually slightly further ahead in the level. There isn’t any way to go back up from here, but luckily you haven’t missed anything important. Go right through the blocks and you’ll see a Rambi crate and a level checkpoint. If you lose Rambi in the area ahead, come back here to get - as strange as it seems - a new Rambi from the crate.
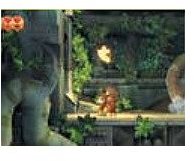
Outside the Ruins

You’ve exited the ruins, and now you can see the sky again. As soon as you pass the level checkpoint, you’ll drop down slightly and go under a platform where a blue flaming Tiki is tossing down fireballs. The platform it sits on has a Rambi face imprinted on it, which tells you that Rambi can break it. Jumping up into the platform will shatter it and defeat the Tiki, but wait until it isn’t tossing down a fireball first. You’ll see two frogs, run through them and the stack of blocks behind them. After the wall crumbles, pound in front of the next plant you see to get the fourth puzzle piece. You’ll see another blue flaming Tiki on a breakable platform. Once again, wait until there aren’t any fireballs falling down and jump up into the platform with Rambi.
After the second flaming Tiki is another stack of blocks that you can run through with Rambi, and after that is a large, solid block that you can knock over into the gap to the right, and use as a bridge. Something I noticed as I was playing this level was that after you push this block into the gap, it will stay there even if you start again from the checkpoint. After crossing the makeshift bridge, you’ll see a few more armored Tikis which are no match for Rambi, a flaming ring and even a DK barrel. Running through a DK barrel while riding Rambi will break it open automatically, so there’s no need to dismount and pick it up.
Race to the End

A large, bouncy flower is now in front of you. Use it to reach the letter N that’s above you, and then keep going right. The second plant you’ll pass (the one in front of a pit full of spikes) has a heart inside. Cross the spikes, and run through a few armored Tikis until you reach an area where you’ll have to jump across a few more bouncy flowers.
If you collect all of the bananas and jump through the flaming ring as you bounce, a large banana bunch will appear at the end in the air. The stone structure you’re on now has another Rambi crate on it. Next you’ll see another large block that you can knock into the gap and cross over. You can expect to find another level checkpoint on the other side with yet another Rambi crate next to it.
Now, you’ll have to run almost the entire time from here to the end. If you stand in one spot for too long, it will probably collapse and you’ll have to start over from the level checkpoint. Although you can run faster by shaking the remotes, doing so will also make the platforms collapse faster. Running at a normal speed will be fast enough while giving you more time to get ready for the path ahead as it appears on the screen. Look out for the letter G along the way, it will be very easy to grab as you’re jumping from one platform to the next. When you reach the final structure where the level end barrel is, go over to the right and pound in front of the container to get the fifth puzzle piece, then jump up into the barrel to finish the level.
Find out how to defeat the third boss next…
Level 3-B: Ruined Roost
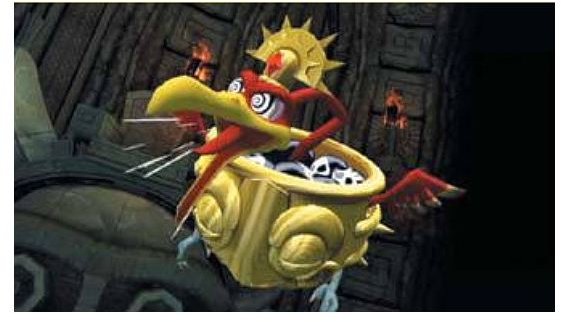
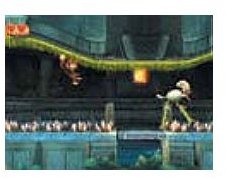
We’re now ready to face the third boss in the Donkey Kong Country Returns game. After you start the level, you’ll find yourself back in the ancient ruins. There’s a DK barrel here at the start, make sure you use it if you need Diddy Kong. Soon you’ll find an egg, and Donkey Kong will watch as a Tiki drops the egg into a golden cauldron below. The Tiki then jumps into the pot and starts controlling the bird as it hatches, and the battle begins.
The bird’s legs and wings stick outside the cauldron, giving the appearance that the cauldron is actually part of its body. The cauldron is also full of bombs that the bird, named Stu, will start throwing at you. Most of the bombs will be black after they’re thrown, and will start flashing red when they are about to explode. The battle arena has several stacks of blocks near the walls, with shorter stacks being further away from the walls. The bottom block of each stack is a grey stone instead of the tan color of the blocks at levels above it.
How to Defeat Stu
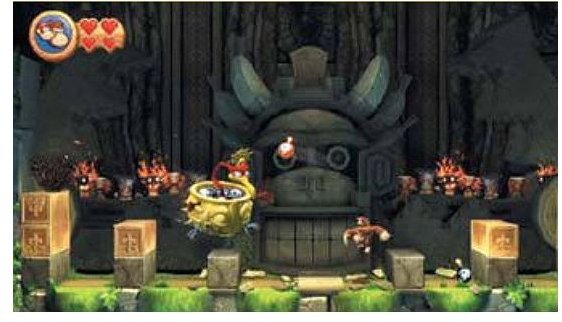
After a few bombs have been thrown near you, pick one up the same way you would pick up a barrel. Jump on one of the stacks of blocks to get some height, then jump up and release the button to throw the bomb in Stu’s direction. The bomb will arch up a little after you throw it, making it a little easier for you to hit him. You cannot be hurt by a bomb hitting you when it’s been thrown, but it will make you drop another bomb if you’re carrying one.
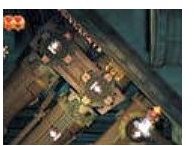
Look out for bombs that start flashing red almost immediately after they land, they will explode much sooner than normal bombs. Bombs that have an orange flame in the center (not the fuse) will explode into fireballs that roll along the ground and climb stacks of blocks. Try to stay out of the center area (the open area between the two shortest stacks of blocks) because Stu will periodically swoop down across the arena. Since he can’t go below the blocks, he will skim the surface of the stacks and the center floor, but you’ll be safe if you’re in between the blocks on the left or right. You can also throw a bomb at him while he is diving down to make him back off.
Round Two

After you score three hits on Stu, he’ll drop a very large bomb. Jump to the top of one of the stacks of blocks to avoid taking damage. The explosion will destroy all of the grey blocks on the bottom of all the stacks. The blocks will all drop down, and the two shortest stacks (the ones made of single grey blocks that were near the center) will be gone.
This will mean that you’ll have to be further to the sides to be safe from Stu when he swoops down. Now there is only one small space between pillars on each side of the arena. Try to stay in one of these two areas until you have to jump up and throw a bomb at Stu. If you do get stuck in the center area, try to run as far as you can away from Stu and duck down. There is a small pocket of space in front of each stack of blocks that Stu can’t reach while he’s diving down.
Finishing the Fight
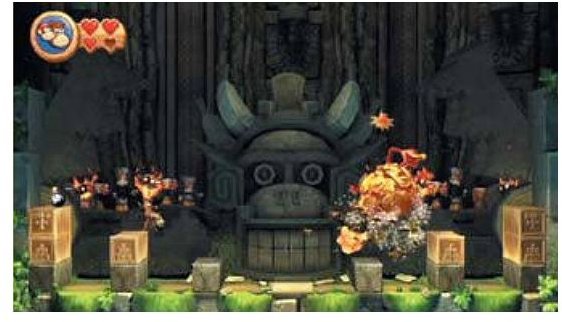
You need to hit Stu with six bombs to defeat him. As you start getting close to that sixth hit, Stu will start moving much faster and use more attacks than before. One new attack will be to throw a large line of bombs across the arena at the same time. Some of them will already be flashing red and the rest will be normal bombs. If one happens to land very close to you, it may still be a good idea to pick it up and throw it if you can jump up to a stack in time. Also, continue trying to throw bombs at Stu as he swoops down, since the stacks of blocks are shorter it’s much harder to throw a bomb high enough to reach Stu at his normal flying height.
Stu’s second new attack will be to drop another large bomb like the one he used before to destroy the lower blocks. The tan blocks that remain won’t be destroyed by it, but the area in the center will contain the explosion. Once again, stay in between the stack of blocks on the left or right and it won’t hit you. After the sixth bomb has hit Stu, the Tiki will be stunned and float out above the defeated bird. Jump into the Tiki and start shaking the remotes when the icon tells you to and you’ll build up a number of successful hits on the Tiki. Get enough hits, and they will unlock something in the extras gallery. Congratulations, you just beat the third boss and completed World Three!
All screenshots and references from Donkey Kong Country Returns.