Continuing our Wii game walkthrough for Donkey Kong Country Returns, we’ve reached the first level of world four. Get ready for another mine cart ride and review the puzzle piece and KONG letter locations along the tracks.
World Four Overview
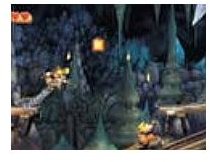
We’ve finished world three, the ruins, and now we’re ready to face world four, the caves. Most of the levels are a wild ride from one end of a cave to the other, and precise timing will be the key to avoiding enemies while collecting the puzzle pieces and KONG letters. In this world, you’ll encounter bats and moles as your enemies. In one level, the bats will be chasing you constantly as you fly through their territory with a jetbarrel, while in other levels mole miners will be trying to derail you from your mine cart ride with bombs and pickaxes.
Level 4-1: Rickety Rails
You’ll start this level on a stone structure with water rolling down it. Slide down and go right, and jump into the blast barrel. It will take you to a stone wall in the background. Jump into the hole in the tree to the left to find the first puzzle piece. Pound in front of the second yellow plant from the left and it will reveal a blast barrel that will take you to a ledge in the foreground, where a DK barrel and a plunger are. Break open the barrel if you need Diddy Kong, and then pound a few times on the plunger to blast open the tunnel in the background. Jump in the blast barrel to the right and it will take you back to the area behind you. Go into the cave that you just opened up.
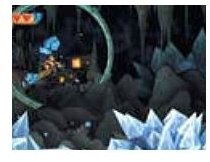
Along the way, you’ll see a few of the basic Tikis crawling along the cave floor, and a few lines of bananas. When you reach a small raised ledge with a Tiki patrolling back and forth in front of a lantern, defeat the Tiki and then blow out the lamp to get a heart. Just beyond that lamp are a few boards that you can use to climb up, but before you do that, go into the wall on the right and jump up to find the second puzzle piece. Now, use the three boards to reach a blast barrel above you. It will launch you over a wall and you’ll slide down into another blast barrel, which will launch you onto a mine cart.
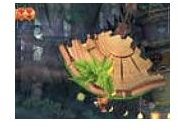
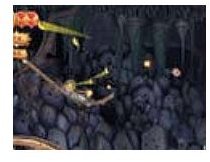
The Ride Begins: Watch out for Bats!
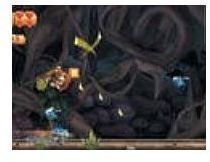
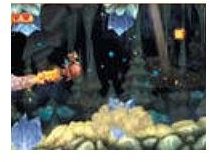
This mine cart is different than carts you’ve been on before in that you are standing on top of it as it rolls along. You can’t walk while you’re on it, but if you jump you will leave the cart. In most cases, you will move automatically through the air and land back on the cart when you jump, but if you try to move right or left mid air you will take control and will be responsible for landing back on the cart.
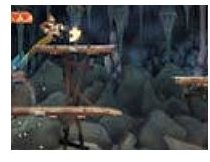
Not long after your ride starts, you will see an arch of bananas over the track. Right after this is another arch just like the first, except the letter K is at the top of it. Jump up to grab the K as a bat flies under you, and you will land back on the cart while another bat flies above you. Jump into the blast barrel and wait for the next barrel to be at the bottom of its movement pattern, and launch into it. It will launch you to the level checkpoint. Walk out across the wooden platform in front of you. It will collapse as you walk over each section. Walk back to the left when you reach the ground below you, and go inside the opening. This is a bonus area. Bounce off of the moving platform to collect all of the items within the time limit, and you’ll receive the third puzzle piece.
Back on Track
Jump across the platforms ahead of you quickly, they will collapse soon after you touch them. After the last fragile platform, jump into the blast barrel, and you will be launched into another mine cart. A huge chunk of ice will fall from above and make a hole in the track ahead. Wait until your cart gets to the edge of the hole (the short part that’s bent down) and jump up, you’ll collect the letter O and land back on the mine cart. From here on, some of the platforms will collapse behind you, but the ones that collapse behind you won’t be a problem. Jump across a few more holes to new carts or platforms.
At the end of one of the collapsing platforms is a blast barrel that launches you to yet another mine cart. As soon as you land on this one, the platforms will once again break behind you, but when you get to a certain part, they will also start falling down in front of you, getting closer. When you get close to the collapsing track in front of you, jump into the next blast barrel. You’ll be fired between a few barrels and then land on a mine cart.
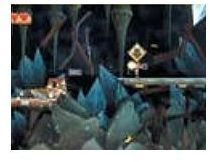
A Few Final Challenges
On this length of track, the rocks beneath you will tilt back. Wait until you reach the end of the track, and jump into the blast barrel. Soon you’ll be on another section of track that will tilt back while you ride across it, but this one will also tilt forward as you reach the end. Stay seated and you will go under the bat, thanks to the track’s tilting, and jump when the cart reaches the end of the track to land on a group of collapsible platforms with the letter N above them. Collect the N and quickly jump into the next blast barrel. Ahead you will find more blast barrels and mine carts riding on fragile platforms, but it won’t be much different than what you’ve been doing this whole time.
When you reach one of the blast barrels, it will launch you up against a wall, and you will fall down through several platforms. When you finally land, wait for the platforms beneath you to crumble, and drop down into a bonus area barrel. Jump around all of the platforms and collect all the items in here within the time limit, and you’ll be awarded the fourth puzzle piece. After you leave the bonus area, jump into the blast barrel to your right. The cart you land on will go right, and lead you to another blast barrel. This one will launch you onto a cart above you that goes to the left for a change. Wait until it rolls off the track, and jump up to where the fifth and last puzzle piece is.
Quickly jump from this collapsing platform into the blast barrels to the right. On the next mine cart, jump into the blast barrel before the cart goes down the slope to collect the letter G and land back on the cart. Finally, make your last jump across the gap as the mine cart falls off the screen, and land on a ledge where the level end barrel is waiting.
Level 4-2: Grip & Trip
As one of the new Wii games, Donkey Kong Country Returns has turned out to be a great game so far, thanks to interesting twists like the one found in this level. Not only will you find regular mine carts to ride, but there are mine trains that you will have to hang onto from below in order to progress. Sometimes you’ll even have to switch between the two!
After you start the level, jump over to the tiny ledge to the right, and jump up from there to the grassy ceiling and grab on. Go right and drop down onto a ledge where a DK barrel sits, break open the barrel if you don’t have Diddy Kong yet, and then jump into the blast barrel. It will launch you onto a mine cart. This cart is just like the one in the previous level, if you jump, you will come off of the cart, as opposed to jumping up with it. It will go down a small slope, at the bottom jump across the gap to land on another cart.
When you see a line of bananas along the track ahead of you, be prepared to jump up to a mine cart on a track above you. When you get to the end of this upper track, make a small jump over the barrier to go flying through the first puzzle and land on a mine cart below you. Ahead, you’ll find a few more gaps to jump across and a few hovering Tikis to avoid. When you reach the second and third Tikis (they’re right next to each other), you can duck under them, but since there is an extra life balloon it makes much more sense to make a large jump over both of them while grabbing the balloon.
A New Kind of Mine Cart Ride
After another jump, you’ll see a blast barrel above you, jump into it to be shot through the letter K and land back on your mine cart. Shortly after you see the next Tiki, you’ll reach another gap to jump over, but you can see half of a barrel sticking up off the bottom of the screen, after the track ends. When the cart reaches the end of the track, jump off and move left mid air to land in the barrel. It will launch you into a bonus area where you can get the second puzzle piece. Collect all of the items in time using the moving blast barrel and the puzzle piece is yours.
After you leave the bonus area, you’ll be back on a cart which will go down a short but steep drop and jump out onto a lower track. Get ready for the Tiki up ahead, and jump high off its head to collect the third puzzle piece and land back on the mine cart. If you have Diddy Kong, try not to hold in the jump button too long after you jump off the Tiki, or you will start hovering and it will put you out of alignment with the cart below you, making it harder to land safely. After you land, jump almost immediately again to go over another Tiki, and jump over another soon after. Jump up and grab onto the grassy ceiling and climb over the three hovering Tikis to get to the next mine cart.
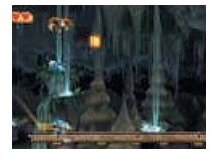
Switching Between Tracks

As you continue riding forward, you’ll see another track above you, jump up and land on the cart above you when you get close. When you reach the end of the upper track, jump along the arc of bananas to collect the letter O and land on a cart below you. Directly afterwards, there is another grassy ceiling to grab onto, keep clinging it as you go right, and a mining train above you will start rolling, carrying you with it as you cling to the grass. You’ll go down a little incline, collecting a line of bananas along the way. Let go when you reach the ledge with the level checkpoint. Pound the sponge-like object to the left of the checkpoint to get the fourth puzzle piece.
To the right there are a few springy mushrooms, bounce across them and cling to the grass hanging from the mining train. It will go down a slope, and soon you’ll see a line of bananas leading down to a mine cart below you. Let go of the grass just before you reach the mine cart and you’ll land on it, while the mine train wrecks above you. The cart will go down a few more slopes, and will then level out.
Lots of Collectibles
Above you, another mining train (with grass hanging from the bottom) will roll into motion. Jump up and grab on to collect a line of bananas under the upper track, then drop back down onto the mine cart for more bananas. When the grass above you gets close enough again, jump up and cling to it until you see some Tikis ahead. Drop down through the gap in the Tikis to collect the letter N and land on a new mine cart on the track below. At the end of this track section is the fifth puzzle piece, jump when you collect it to cross the gap to the next cart.
After a few more jumps, the track will slope up, and then end, with track continued below you. Jump over to the Tiki before the cart drops, and hover jump with Diddy Kong’s help to the blast barrel. You will be launched into a mine cart area in the background with lots of bananas and coins. At the end of this area, as you jump into the blast barrel that takes you back to the foreground, you’ll collect the letter G. You’ll be taken to one final mine cart. When it reaches the end of its short track, jump off and land on the ledge to the right where the level end barrel is.
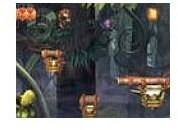
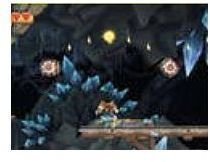
Level 4-3: Bombs Away
After you start the level, go left into the mine entrance to find a nice collection of bananas. Go right and jump onto the mine cart when you reach it. Ahead, there are a few spots where you will have to duck down into the cart to avoid overhead objects. If you jump while ducking, you will temporarily sit up out of the cart, but as long as you hold down on the control stick (or control pad if you aren’t using the nunchuk) you will duck down again as soon as you land. If you can duck down through most of the level, you won’t have to worry about switching back and forth.
After the mine cart starts rolling forward, it will go down a little incline and then encounter two gaps in the track you’ll have to jump across. You’ll be able to collect the letter K during the second jump. As you continue along the track, you’ll see a mine cart traveling in the foreground with a mole inside. It won’t do anything for now, so focus on the track you’re on. After jumping another gap, you’ll see a yellow caution sign with a down arrow. This is a warning that you should duck down in the area ahead, the crystal shards in front of you are hanging dangerously low. At the end of the track, you are clear of the shards, so jump across the gap to the next section of track.
Ducking and Jumping
There is a track above you with a line of bananas along it. You can jump up off of the mine cart mole heading towards you to reach the higher track. If you reach it, jump across the gap at the end to reach a small piece of track holding the first puzzle piece. If you missed the first track, there is a second mole you can jump off of to reach the puzzle piece. After landing on a track below you, lightly tap the jump button to leap across the gap without hitting the crystal shards above you. Jump to a higher track, and stay low as you go down a slope under more shards. At the bottom of the slope, jump as soon as you are clear of the shards.
The ceiling above you will start to drop down. Jump over the two barriers on the track (be careful not to jump too high over the second one), then duck under the shards. The timing to get the O can be tricky. Jump up as soon as you are clear of the crystal shards, and you’ll collect the letter O up against the wall. There are two tracks ahead of you, make a small jump and land on the bottom track to collect the second puzzle piece, then jump up to the top track. After jumping a few more gaps, the mole in the mine cart will ride back into the foreground, and throw a few bombs onto your track. These bombs will make holes in your track, but a few simple jumps will get you past them. Also look out for a few moles in mine carts heading towards you on your track.
More Mole Encounters
Soon, the mole in the foreground will throw bombs into the spiky crystals behind you, and they will fall through portions of the track. Jump over these spots. After jumping across the second gap created by the falling shards, let the cart drop into the third gap, and you’ll land on a track below you where you can find the third puzzle piece. Jump back up to the main track again, and quickly duck under some spikes, followed by a jump over a gap. Now you’ll do the same thing again, duck under some more spikes and then jump over another gap. On this track, you’ll pass the level checkpoint.
Ahead of you, some crystal shards will drop down over the track. Duck under them and jump as soon as you are clear of them to avoid a mole. Make sure your jumps in this area are small, just lightly tapping the jump button should do the trick. More shards will come down, duck and then jump over a small gap. Duck under yet another cluster of low-hanging shards, and then sit up out of the cart in the area with the line of bananas. At the end of the bananas is the fourth puzzle piece, but duck as soon as you reach it to avoid more spikes, and jump again soon after to cross another gap.
A Thrilling Ending
Ahead of you will be five moles riding in mine carts, heading the same direction as you are, but at a slower speed. As you catch up to them, jump and bounce off of the first mole. Don’t jump any more until you reach the fourth mole, just let yourself bounce. If you got your timing right, you should be able to jump up off the fourth mole to collect the letter N above you. If you notice you’re bouncing more towards the right side of the moles, you can also usually collect the letter N while jumping up off the third mole. After another gap in the track, the mole in the foreground will appear again, and throw more bombs onto your track. Jump over the first two gaps like you did when you were jumping over the previous bomb holes, and then make two small jumps followed by a longer one over the next gaps. Then, duck down as you go under more crystal shards.
After you’re past the shards, the mole will throw a large bomb at your track. Make a large jump followed by a small one to get past the wreck. Then you’ll ride onto a circular piece of track that will break loose and start rolling down the hill. There are crystals all around, but as long as you jump whenever you get to the part of the circular track with a hole in it, you’ll be able to avoid having any accidents. You can collect the letter G during the first jump. At the bottom of the hill, the rolling track will stop, and you can jump out through the opening. Your cart will then throw you out onto the ledge where the level end barrel is, but don’t finish the level yet. Run into the cave to the right to find a secret area, and collect everything in the room within the time limit to receive the fifth puzzle piece.
Level 4-4: Mole Patrol
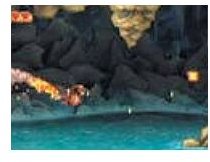
After starting the level, go left into the wall and you’ll find a secret area filled with bananas and coins. If you can collect all of them before time runs out, you’ll get the first puzzle piece. At the end of the ledge outside, you’ll see a jetbarrel. Jump into it and hit the jump button a few times to fire up the engine, and you’ll be on your way. Since there are a lot of places in this cave that require you to fly nearly level, tap the button quickly a few times to get a feel for flying mostly in a straight line as you collect the bananas in the middle, bottom and then top of the screen.
The next line of bananas is a little wavy. If you follow it, you’ll collect the letter K, and if you collect every banana in the wavy line the second puzzle piece will appear at the end of it. You’ll see a mole below you waving a pickaxe in front of itself. Avoid touching the moles with pickaxes or you will instantly lose a life. You’ll see an extra life balloon floating out near the center of the screen, make sure you collect it.
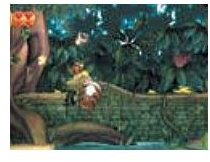
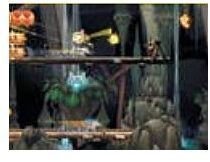
Mole Minetrain
Fly up and down to avoid some more moles on the floor and ceiling. Soon, you’ll see the wall in the background break open, and a mining train will come roaring out along the track. It will drop off more moles now and then, but these moles will be attached to a small balloon that you can pop if you fly through. Just make sure you don’t hit the mole instead of the balloon.
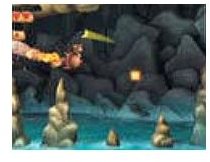
After flying up to avoid a sharp rock, you’ll see some mole miners ahead breaking some crystals off of the ceiling with their pickaxes. Fly near the center of the screen and you’ll be able to avoid hitting anything. The mining train will drop two more moles with balloons, fly near the top of the screen or fly into the balloons. Sometimes you can get some bananas or other items from popping the balloons. The area ahead is filled with some sharp rocks jutting up out of the water, fly over them, but dip down slightly to collect the letter O, and then fly back up before you hit a rock.
Follow That Train
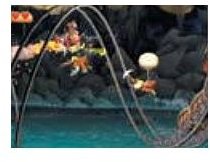
Now you’ll pass by the level checkpoint. Follow the next wavy line of bananas, collecting every one, to make the third puzzle piece appear at the end of the line. The mining train is still riding the rails in the background, and it will drop a few new floating moles in your way. You can try to avoid them or pop their balloons. When you reach the spot where the track swirls around you, making the train do barrel rolls, pop the balloons of all four moles to reveal the fourth puzzle piece. Needless to say, make sure you collect it as well.
Just after you pass where the fourth puzzle piece was, drop down to collect the letter N, near the water, and then pull back up. The mining train left the rails and is now digging through the wall. Follow it, and fly along the path it clears. Try to keep an eye on where you are in relation to the ceiling and floor, it can be easy to be distracted by watching the train ahead of you and run into something.
More Crystals and the Level’s End
The tunnel will alternate going up and down, and then the train will break through the wall and go flying off a ramp. It crashes into the ground, and you’ll fly over where it landed. There are more crystals hanging from the ceiling ahead, and they will fall and stick up from the ground. As you fly between them, the space you’ll have to maneuver will get smaller and smaller.
Near the end of the falling crystals, make sure you collect the letter G. After you leave the falling crystal area, the jetbarrel’s engine will sputter and give out, dropping you on the ledge where the level end barrel is. Before jumping into the level end barrel, run to the right and pound in front of the sponge-shaped rocks to find the fifth puzzle piece.
The rest of the series is coming soon…