An initial overview on how to use different unit types in Elven Legacy to amplify their strengths and mitigate their weaknesses. This Strategy Guide includes tips for new players in selecting units, preparing assaults and conserving forces.
A Beginner’s Guide to Elven Legacy
Paradox Interactive’s Elven Legacy, a sequel to Fantasy Wars, brings a whole earth of strategic depth in the turn-based strategy genre. Although not completely novel in its creation as games by SSI, and arguably King’s Bounty, share some common elements with it, the game excels by filling a long-time void in providing tactics and strategy with less emphasis on role-playing (see King’s Bounty and Heroes of Might and Magic) and more emphasis on detailed battles between troops.
This being said, how does one begin such an immersive turn-based fantasy driven game without pulling their hair out? If you have not read the reviews of Elven Legacy , some of the criticisms of the game are that it is “too hard” or “only for the hardcore gamer.” This guide aims to debunk some of those claims by softening the learning curve so that you can start enjoying Elven Legacy’s depth before it frustrates you.
Overview of Units
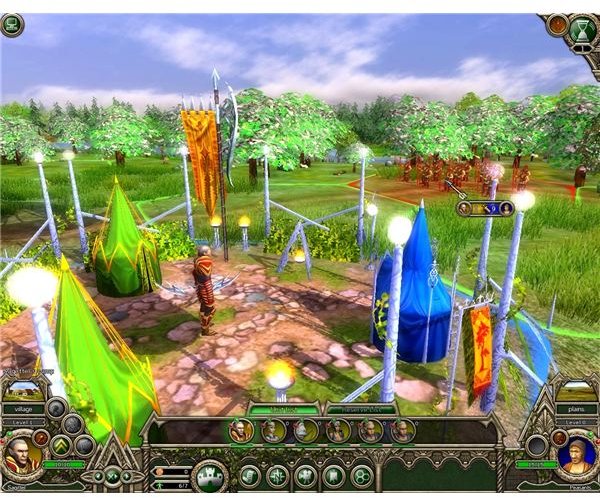
Elven Legacy’s advertisement regarding five races (elves–two races, humans, orcs, and dwarves) is a bit dubious as you only have the elf campaign to play. However the Mission mode, which is akin to skirmish mode in many real-time strategy (RTS) and turn-based games, allows you to play individual missions made up of the different races. In all there are approximately 13 missions other than the elven campaign. This number may seem small, but the gamer enjoys “replayability” options that allow varied unit selections and different avenues of attack to keep both the addiction and fun factor high.
The key factor to keep in mind is that the units in this game are for the most part not cannon fodder and have to be managed precisely and accurately. Failure to heed this advice will lead to several losses both in campaign and mission mode that even the best player cannot recover from. In short, manage your unit formation and protect your soldiers. This is not a blood-spilling let the “chips fall where they may” game!
This beginner’s guide will start you off on the basics to allow you to forge ahead by focusing on units. Keep in mind, units differ from race to race, but for the most part all armies share these categories:
Units:
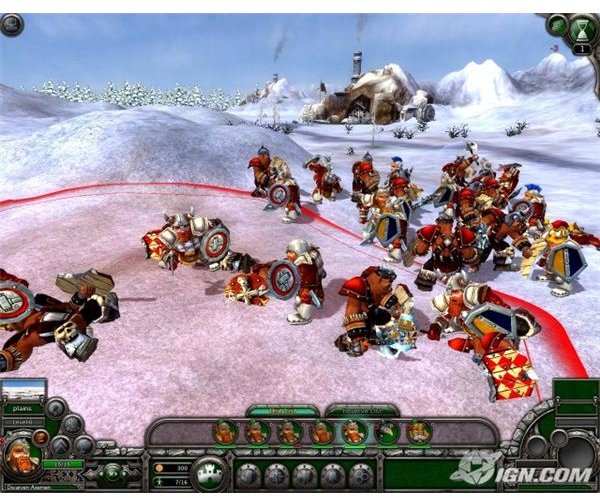
Heavy Cavalry: For the most part these units lead assaults against any and all transgressors. All races share these beasts of power in one form of another, and the key to using them effectively is to make use of their “charge” abilities in open fields and to take advantage of their many movement points. Vulnerable to archers and siege machines, make sure you move them forward with your own scouts, siege engines and archers. Additionally, use of your mage’s summoning abilities provides “dummies” to keep attacks away from your noble horse or deer men (for elves). If your enemy relies on these beasts too much, use your light infantry (defensive specialists) with long pole weapons to dismount the lancers.
Light Cavalry: These units have more movement points, but less power. They are great for flanking the main force and ambushing opposing mages and archers that pick you off from the back lines.
Heavy Infantry: Often too expensive for their worth (compared to light infantry) these are your best melee attackers in the game and are great for front line assaults where terrain is less of a factor. Strategically, get them upgrades as soon as possible to see them really prosper offensively, serving a dual purpose as lead battlers and defensive units when needed. They are ideal for defense when positioned within castles and towns. Notice, the use of such units as halberdiers or comparable units are critical in defending against a force intent on using mounted beasts (heavy cavalry). Tip: Position Heavy infantry on higher terrain, such as raised hills and watch their attack bonuses stack for attacking 4-legged beasts. Weakness: Since they are unmounted, their movement points are poor, making them susceptible to counterattacks or an ambush.
Next Page
Light Infantry, Air, Siege, and Hero Units
Lesser Infantry
Light Infantry: One of the major benefits of light infantry involves their movement points as well as defense and ambush skills. The latter is great, in that elite light infantry are great for defense, cutting down archers, and surprising foes. Some units have great defensive properties, allowing for huge terrain benefits. If you are near a forest and need counters to scout traps—use these shadow walkers.
Scouts: These fragile units benefit from dual move settings allowing sneak attacks followed by fleeing maneuvers. Additionally, special skills allow for such things as poison infliction where an enemy cannot heal their favorite cavalry unit, hence their attrition causing ability cannot be forgotten in lieu of the terrain-blending capabilities.
Archers: The most critical support units of the game, archers are great for both defensive and offensive use. The key to keep in mind is that archers are vulnerable to air attack as opposing armies can take advantage of movement points to attack one’s flank. The two most important upgrades for archers are auto-counterattack (a passive skill) and range. The latter increases their defensive prowess to stop reckless cavalry assaults on your front line troops. Remember to attack with archers and use the rest of their turn to flee the battle space, saving them from counter-attack.
Airforce of Creatures

Air-Fighters: These units are great for pursuing retreating forces. These bad birds or dragons or ghost vessels allow you to attack both fliers and ground units. They are a great counter to bombers, as bombers cannot retaliate, but are vulnerable both to archers and infantry when they sweep low for attacks.
Air-Bombers: The key to using these units effectively is that you want to attack infantry or archers that are low on health. The infantry cannot defend, and archers will die if their health is low – hence you will face no counter-fire. Keep them away from shooters and Air-Fighters during all other times.
Critical Siege Engines and Heroes
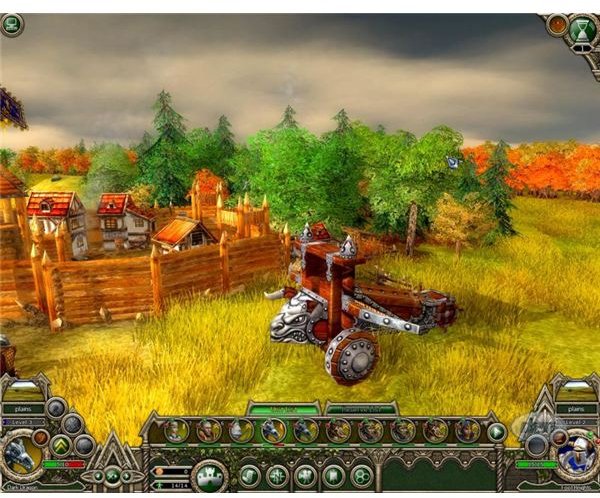
War-Machines: I’d go so far to say that these are the most important units on the battlefield – other than your hero. Do not lose them, and keep them far in your backlines. They are crucial to attacking all units, and great for sieging castles from afar – keeping an enemy’s defenses from having any utility. Always upgrade their range before anything else as the unit levels. Consider using heavy infantry to block out any incoming enemies (per careful hexagon unit spacing).
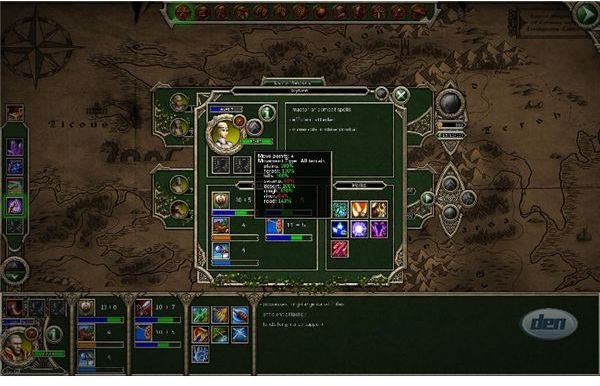
Hero: The variety of the Hero class and whether it is priestly, mage, scout archer or melee specialist, is great and their composite upgrades make them the most powerful units and game changers. Although you may be tempted to use them at the pointy end of the spear, you are best to apply them for counter-attacks when the enemies’ flank is open. They can die as easily as a normal unit, and this often means mission failure. Use them wisely and understand you want them upgraded first as their rising power is unparalleled to normal units. Hence if you see a town with a possible artifact, this means gold and experience (most of the time). Give it to your hero if possible.
Final Beginner Tip: Remember that your flying creatures, siege engines and heroes often can heal all damage in a single rest period if they are away from danger. Take advantage of this benefit for any initial attack and retreat scenarios, even if it means risking your life! The quick save command allows you to go back and re-play a particular strike or attack.