You have almost found out what happened to Bess. Now, it’s time to apply what you have learned and figure out where the kidnappers have left Nancy’s friend. Be careful, or both Nancy Drew and her friend may need to be saved from the clutches of the villains
Johnny Rolle’s GPS Chart
Nancy Drew and the Ransom of the Seven Ships requires you to explore a dark cave next. A glow stick might come in handy. If you were not on a remote island in the Caribbean, you would probably go to the store to pick up such an item. In this game, Johnny Rolle seems to have the items you need to complete the adventure.
Drive the golf cart back to Sangre Beach to find out that Rolle wants you to program his GPS system before he will give you the glow sticks. Take the navigation chart and the GPS from his camp site.
The chart shows the island you are on and several nearby landmarks. The red marks on the map helps you figure out the coordinates of the landmarks. Each red line represents by .03 degrees. The navigation chart shows your current location. Use the lines on the chart to figure out the other coordinates. If you do not want to solve the puzzle, the coordinates are listed in the section below.
The GPS Coordinates
- Half Moon Bay is N23 deg 57’, W74 deg 30'.
- Dread Island is N24 deg 00’, W73 deg 24'.
- Danger Reef is N24 deg 09 ‘, W74 deg 18’.
- Kraken Whirlpool is N23 deg 54’ W74 deg 12'.
- Shipwreck Shoals is N24 deg 06 ’ W74 deg 00'.
- Gull Rock is N 23 deg 51’ W73 deg 48'.
- USS Cyclops is N24 deg 09’ W73 deg 42'.
- Bermuda Triangle is N24 deg 18’ W73 deg 27'.
When you have entered the coordinates into Rolle’s GPS system, return to Rolle and get the glowsticks from him.
Deep Sea Shark Diving

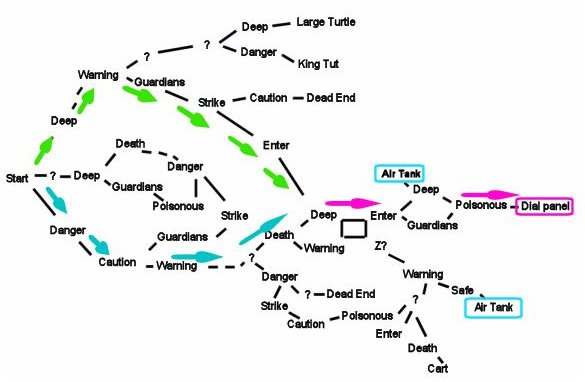
Return to the Shark Diving Ecotourism resort and tell George what has happened. Fill your air tank and head back out to the Blue Hole. Save your game before entering the water. The tablet you found in the bat cave gives you the meaning of each symbol. Avoid any path in the cave marked with the death or danger symbol.
At the end of the path through the underwater caves, you should find a panel with six dials. You must place these dials on the panel and turn them so the colors or patterns are lined up properly. Make the necessary changes and save the game. (The picture in the next section shows the safe paths you can take to get through the Blue Hole maze.)
The Sands of Time
El Toro’s journal mentioned that he hoped that he and his remaining crew would all perish at the same time. His exact words were “What a blessing it would be if all seven hourglasses ran out at the same time." Solving the dial puzzle opens another puzzle with seven hourglasses.
You will have three tries to get this puzzle right. If you do not, the game ends and Bess is left to whatever fate the kidnappers intend for her. You can use the solution below, but it is not the only solution to the puzzle.
1. Turn Humilidad. The counter starts at 27.
2. Turn Generosidad at 25.
3. Turn Castidad at 20.
4. Turn Paciencia at 15.
5. Turn Templanz at 11.
6. Turn Caridad 6.
7. Turn Diligencia at 2.
The spikes guarding the treasure lift. Take the treasure, the map of the western half of the U.S., and most importantly the spare air tank. Navigate your way back to the surface by looking for the guardians, deep, strike and warning symbols on the passage ways. Take the spare air tank before heading back into the water. Get out of the cave and save your game.
Ransom of the Seven Ships - Nancy Drew Rescues Bess
Check in with George. She wants to go with you to the final cave, but this must not happen. Have Nancy start an argument so she can go alone. Return to Sangre Beach and talk to Rolle. Give him the map to Cibala, City of Gold. Something happens shortly afterwards and Nancy gets thrown into the cave where the kidnappers hid her friend Bess.
Neither you nor Bess likely intends to stay in the cave. Bess needs food and water. You can find your way out and find the treasure of El Toro as you reach the exit. Examine the wall of the cave you were thrown into. There is a keyhole on the door. Use the key you got from the hourglass puzzle on the lock. A door opens and you find the final resting place of El Toro.
Click on the skeleton and take a skeleton key from it. Click on the bull and a picture behind El Tor reveals a chest. Click on the picture and the game will show you a symbol puzzle.
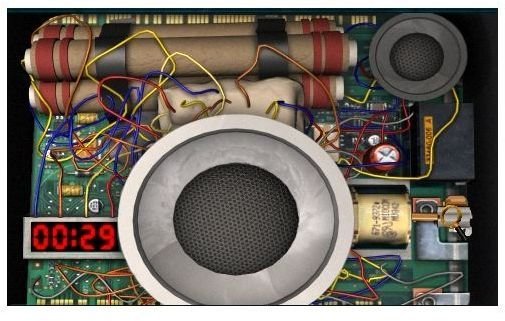
You should expect disappointment here. A Spaniard loyal to the Spanish crown would not let pirates get his treasure so easily. You must open one more lock to find El Toro’s treasure.
Insert the hour glass and El Toey’s skeleton key into the holes ont he box. Turn the keys and see how the buttons are affected. Press I, II, IV, and V. Read the last page of El Toro’s journal. The final page helps you deduce the correct key to use on the last lock.
Open the X plate on the door to reach this lock. The green cutouts are bronze, and the iron ones are brown in color. Make sure you use the key you got you found on El Toro to open the final lock. When you solve this puzzle, the door opens and you can exit the cave with Bess.
Good work, Nancy , you have saved your friend Bess and solved a three hundred year old mystery at the same time.
This post is part of the series: Nancy Drew and the Ransom of the Seven Ships Waltkrhough
Find the links to the other articles in this walkthrough here.
- Nancy Drew and the Ransom of the Seven Ships Walkthrough (Part One of Four)
- Nancy Drew and the Mystery of the Seven Ships Walkthroough (Part Two of Four)
- Nancy Drew and the Ransom of the Seven Ships Walkthrough (Part Three of Four)
- Nancy Drew and the Ransom of the Seven Ships Walkthrough (Part Four of Four)