Now that you have finished the Goron mines, you must return to Karaiko village and get ready to meet another one of the popular Legend of Zelda races, the Zoras.
Finding Hearts in Karaiko Village
Twilight Princess returns you to Karaiko Village after you defeat Fyrus. Head to Barne’s Bomb shop and purchase the premium kit, because you never know exactly when you will need an explosive device in these games. Stock up on other supplies such as healing potions, milk and other miscellaneous adventuring gear.
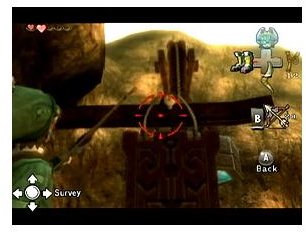
Jump up on the Goron outside the bomb shop and land on the roof. Run across the roof and up the ladder. Climb the mountain until you find a Goron on watch duty. Speak with her and she asks you to demonstrate her bow. Follow her instructions and shoot the target. You will earn a piece of heart as your reward.
Go to the rock that had blocked your way earlier. Use one of the bombs from the premium kit and clear the rock. Go into the room and equip the iron boots. Sink to the bottom of the water and walk forward towards the chest. Open the chest to find another piece of heart.
Finding the Map to Get to Lake Hylia
Go back to the village and pick a clump of grass. Use the grass to call Epona. Mount the horse and go to the northeast. Jump over the gate and head into Hyrule Field. Head toward Hyrule Castle, but stop at the Kariako village mailbox and get the letter that tells you how to make arrow bombs. When you reach the boulders on the path, use bombs to clear them. When you have cleared the path again, walk or ride forward and enter the Twilight Realm.
Dismount Epona and follow the trail until you find the purse. Enter sense mode to get the scent of Lila. Follow the scent trail until you come to Telma’s Bar. Look around the bar until you find a map on one of the tables. You should be able to see Lake Hylia.
Exit the bar and head towards the lake.Travel east until you come to a rope bridge. A flaming arrow sets the bridge on fire and you must make your escape. Jump onto a box in the puddle below and swim to shore. Talk to the spirit on the other side. The spirit makes a monster appear to the north of your current location.
Go back to the bridge and avoid the arrows. Attack his bird when he mounts it and comes after you. When you finish the bird off, attack the archer. Continue forward on the path, dodging any falling objects. Dash underneath the final three pillars at the end and climb up the wall to get to the next portion of the game.
Freeing the Zoras from the Frozen Lake
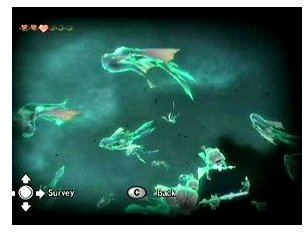
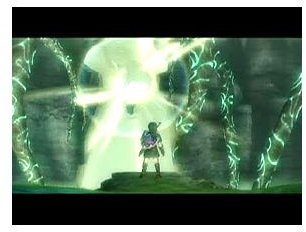
Continue along the path until you find three more Twilight Creatures. Use the spirit barrier to destroy them. Look down in the lake and see the frozen Zoras. You must find a way to unfreeze the lake and reverse their fate. Use the nearby warp point to go back to Death Mountain. Midna will accompany you. The spirit will send a fiery rock down to the frozen lake. Warp back to the frozen lake and watch it hit. When the rock melts the lake water, speak to the nearby Zoras. Jump into the lake and swim to the waterfall.
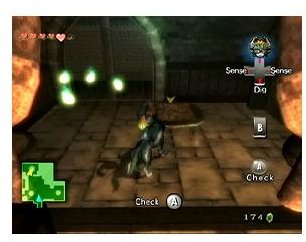
The waterfall will deposit you in a cave near Lake Hylia. Speak to the spirit in the cave and he will have you collect more insect tears.
The mini-map will show you the location of the tears and you must find them while you are in wolf form. Defeat any enemies as necessary and do not be afraid to get your paws dirty. The final tear is found near Hyrule castle. When you dig the last tear up, you will be transported back to the Light spirit you found and the spirit will return Link to his human form.
Link: the Elven Cannon
Author’s Note: I know Link is not an elf, but most people in Hyrule do have pointed ears.
Return to Lake Hylia and find the cannon operator. He will let you use his cannon for ten rupees. If you need to collect the necessary rupees, do so. Pay the fee to have him launch you onto one of the taller buildings in Hyrule Castle Town. Drop down from the roof and enter the building.
When you get inside the nearest building building, play the mini game for twenty rupees. You can earn a piece of heart. There is also a hidden skill found in this area that you should pick up before moving forward. You must have used the howl stone earlier to find it. Look for a wolf spirit near Hyrule Castle Town.
.
Getting the Zora Princess Help
Go back to Telma’s bar. You can spend time here chatting with the patrons, but you must venture into the alleyway outside the bar. A sick Zora child rests in the alley. The treatment she needs is found in Karaiko village. A carriage will take her to the village. You must ride on horseback.
Equip your bow and go to the bridge in town. When you get to the bridge, a goblin guards it. Aim for the center of the goblin’s chest to defeat him. The next set of enemies shoots fire arrows at the carriage. You can either attempt to knock the arrows out of the sky, or you can use the Gale boomerang to cool off the coach.
The coach will come to a gate after the goblin fight. Use the key on the gate and get back on your horse. The cart will continue forward until several more monsters attack it. Defeat the monsters and wait for the flying bird to drop a bomb on the carriage. You must shoot the bird down. If you do not do this quickly, the wagon will circle around in an imitation of the defensive maneuver used by wagon trains crossing the Great Plains. The next attack follows the same pattern, but there will be no further attacks upon the carriage.
Getting the Zora Armor
Now that you have delivered the Zora child safely to the village, follow a spirit into the graveyard. The spirit will remove one of the tombstones, which will reveal a new path. Make sure you have the bombs that will work underwater and climb down.
Remove the obstacles until you come through a clear room. Pick up the Zora armor in the room and read the text that scrolls across the screen. Continue through the tunnel and use the bombs to remove any obstacles in your path. You will come out of the cave in Lake Hylia.
Swim through the lake until you reach a jet of water. Place a bomb on top of the jet of water. Let the water jet rise up and have the bomb destroy the blocked door. Remove your boots if you have them equipped, and use the water jet to get to the next area in Twilight Princess.
This post is part of the series: Full Walkthrough for Legend of Zelda
Get help and answers for every part of Legend of Zelda: Twilight Princess.
- Legend of Zelda Twilight Princess Walkthrough for the Wii: Part One
- Legend of Zelda Twilight Princess Walkthrough for the Wii: Part Two
- Wii Legend of Zelda Twilight Princess Walkthrough: Part Three
- Legend of Zelda Twilight Princess Walkthrough for the Wii: Part 4–Goron Mines
- Legend of Zelda Twilight Princess Walkthrough for the Wii: Part 5 – Karaiko Village after the Goron Mines
- Legend of Zelda Twilight Princess Walkthrough for the Wii –Part 6 of 10– Lakebed Temple
- Legend of Zelda Twilight Princess Walkthrough for the Wii – Part 7 of 10 – After the Lakebed Temple
- Legend of Zelda Twilight Princess Walkthrough for the Wii – Part 8 of 10 – Arbiter’s Temple
- Legend of Zelda Twilight Princess Waltkrhough for the Wii – Part 9 of 10 – Snowpeak Mountains
- Legend of Zelda Twilight Princess Walkthrough for the Wii – Part 10 of 10 – Sky Temple and Final Bosses