You may not be halfway through the game yet, but the good news is you are halfway through the walkthrough. Get ready to explore the areas after the Lakebed Temple. You still won’t have a clue what is going on exactly.
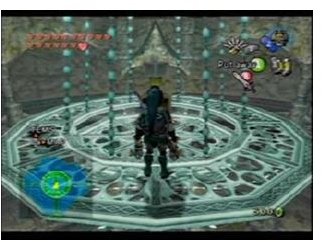
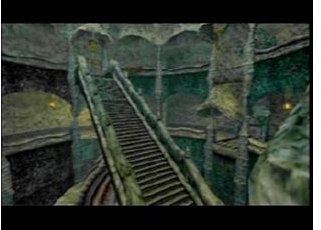
The Main Room of the Lakebed Temple
The Lakebed Temple Lies before you. Enter the now open door and swim in. Use the Zora armor to be able to breathe underwater. Walk over to the stairs and pull on the gold lever. The door that takes you into the next room should now be open.
Watch out for falling stalactites when you enter the next room. Equip your bow after the first one drops. Aim the bow at the stalactites at the ceiling. Fire a few arrows to knock the stalactites down. With the stalactites cleared, you will face no dangers from above here.
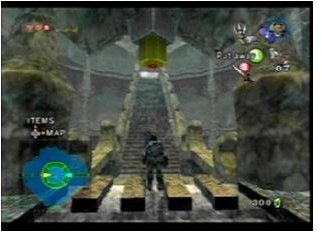
Walk into the next room and go to the bridge . There is a chain here, but its only purpose is to confuse you. Find the lever in the room and pull on it until you can rotate the bridge to face you. Walk across the bridge and climb the staircase. The dungeons in Twilight Princess always contain the spirit Ocococo. Turn to the left at the top of the bridge and break some jars there. Find the spirit and head forward. Ocococo, as has been noted several times before, teleports you outside of a dungeon. (This feature is handy when you are low on health potions and other needed items.)
Walk to the other side of the stairs and pull on the chain found here. Rotate the staircase until it faces you again. Climb down the steps until you find a chest. Open the chest to get a copy of the dungeon map. Now that you can see where you’re going in the game, enter the door here
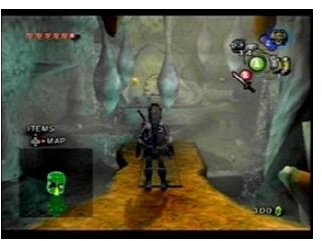
Shoot Down Some Stalactites, Link
The next room contains more stalactites that will fall on you. Instead of entering the room and waiting for the first one to fall, look up to the ceiling and shoot at them with your bow. Proceed across the room when the ceiling hazards are clear. Walk until you come to a ledge and then follow the ledge to your right. You will eventually find a place that will allow you to cross.
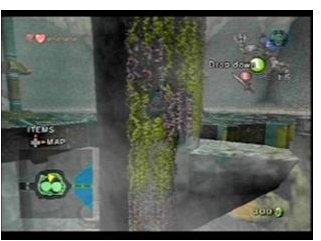
Vines cover the other side of the wall. A structure rests inside the vines. Climb around the vines until you can reach another chest. (The best solution is to climb around the structure counterclockwise.) Drop down from the vines when you find a chest. Get the small key from the chest and run across the room until you find the locked door.
Open the new door using the key and get ready for the next room. Check the ceiling for stalactites and shoot down any hanging rocks that you find. Cross the bridge and shoot down two more stalactites. Two red pillars rest on the other side of the room. A rock blocks your progress. Set a bomb against the rock and step back.
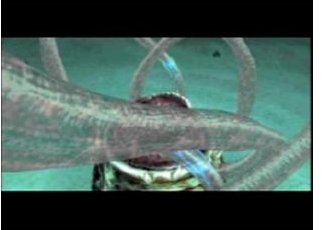
The Creature in the Bubble
Watch a creature enter a water bubble. It does not pose an immediate threat to Link, so you may run past it safely. Enter the room to the east. Look around the room until you find another chest. Take it to get another small key.
Find the locked door to the right of the room and open it. Find the locked door to the left and use the small key to open it. The platform is irrelevant at the moment. Check the ceiling of the next room and shoot down any stalactites that may or may not be there. (The stalactites seem to be in about one in every three rooms, although this is merely an observation of the author.)
Go over to the ledge and climb down the vines there. Find one of the two ladders and climb up one. You will find a pulley system with a handle you can hold rigged to the ceiling. Jump up on the handle and slide down it. The pressure on the rope activates a water gate. Ride the rope down and jump into the water.
Link Goes for Another Swim
Swim to the platform in the center of the water filled area. Pull the lever to fill another area with water. Dry off if you so desire and enter the room to the south. Travel to the room to the east of the room you just entered.
The game displays a brief cut scene when you enter the next room. It shows the water level rising. Go to the other side of this room and press a lever there. (You must cross bridges and stairs to do this.) Run down the stairs after you press the switch and cross the bridge. Enter the room with the rotating platforms and ride them to the Northern door. Find the treasure chest and get the small key from it.
Travel to the western side of the room and unlock the door there. Go to the far side of the room and equip your iron boots. When you sink to the bottom, use an iron bomb on the obstacle that blocks your way. Unequip your iron boots and get out of the blast range. Put your iron boots back on and walk through the door
Mini-boss Fight
Drink any health potions and get up to full health before entering this part of the game. The mini-boss may not be difficult, but even the mini-bosses in the Zelda games are dangerous for people who are nor prepared. Swim up to the surface of the next room.
The mini-boss jumps down to the floor and sends a variety of small creatures swimming toward you. You can use your shield to block the enemies or do a spin attack. The mini-boss takes to the air after you defeat the creatures. A shadow on the ground will show his landing spot. Move around the floor to avoid the spot where the shadow indicates the monster will come down.
The mini-boss will land and get stunned from the force of the landing. Use your sword to slash at his now exposed tongue. Jump back when he recovers and get ready to defend yourself against more of the tiny creatures.
Like all Zelda bosses and Mini-bosses, the strategy is fairly simple and the repetitive attacks let you beat the monster easily. The mini boss for the Lakebed Temple drops a longshot claw. This ranged weapon lets you grab onto things and pull yourself to them.
Getting to the Final Boss
Equip the clawshot you just won from the mini-boss. Face the south and launch the weapon towards the door to the south. You want to reach the tile above the door.
When you are on the platform in the next room, aim the clawshot to the vine. Climb down and then go back to the room with the rotating staircase. Like many of the earlier dungeons, you must find one final key and find the boss not far from the area you entered the cave from.
You need to use the clawshot from the western side of the room. Attach it to the ceiling tile and use the tile to rotate the bridge toward you. Walk across the bridge and through the door. Those who believe that they need extra hearts to complete the game should use the clawshot to climb onto the chandelier and find the chest that lies there.
Go into the next room and simply walk through the water wheel. (Well, walking between the spokes works a little better.) The next two rooms involve the use of a clawshot and the final room in this sequence requires the use of your bow to drop a stalactite from the ceiling. The rooms are in a straight line (more or less) so the player does not need to worry about directions too much.
When you get to the final room in this sequence stop before you enter it. Equip your bow and walk into the room. Shoot the stalactites down from the ceiling. Use your clawshot on the eastern wall of this room and drop down to the chest. Open the chest to find the compass.
Getting the Big Key
Compasses are useful devices for any adventurer, but you must find the Big Key for the Lakebed Temple to get to the next Legend of Zelda Twilight Princess boss. Find the next ladder and climb down it.
Go back to the water wheel and go to the right. You will see some spinning cogs. (It is unlikely, however, that this dungeon was made in a shop in Switzerland , sadly.) Use the clawshot to attach to one of the higher cogs and pull yourself to the eastern side of this room.
Make sure you equip your iron boots and sink in a southwesterly direction. Place a water bomb against the rock blocking the door and get to a safe distance. When the bomb clears the path, get ready to enter the next room. Get the Big Key from the Chest here and exit this room from the same entrance you came in from.
Return to the room with the staircase. Equip your boots and enter the water. You will go to the bottom. Find the lock door here. Use potions to get to full health and get ready to face the Twilight Princess Lakebed Temple boss.
Twilight Princess Lakebed Temple Boss: Morpheel
Swim into the temple and avoid the bomb fish. Morpheel will come towards you. His few attacks can be easily avoided although he is hard to catch. Try to get close enough with the boss to swing at his eye with your sword. (If the eye is close, the sword slashes will open the eye.) Hit the eye a few times and the boss will change forms. The good news is that the eye is still his weak spot.
Depending on which form Morpheel takes, it may be necessary to use your clawshot to latch onto his back to get to the eye. The major problem is getting to this boss as he can swim much faster than you can.
When you beat the boss, you gain a heart container and a shadow-fused container as your reward.
The Legend of Zelda: Twilight Princess is rated T for Teen .
Sources
Legend of Zelda Twilight Princess Screesnhots
IGN Walkthroughs – Twilight Princess
Personal Experience
This post is part of the series: Full Walkthrough for Legend of Zelda
Get help and answers for every part of Legend of Zelda: Twilight Princess.
- Legend of Zelda Twilight Princess Walkthrough for the Wii: Part One
- Legend of Zelda Twilight Princess Walkthrough for the Wii: Part Two
- Wii Legend of Zelda Twilight Princess Walkthrough: Part Three
- Legend of Zelda Twilight Princess Walkthrough for the Wii: Part 4–Goron Mines
- Legend of Zelda Twilight Princess Walkthrough for the Wii: Part 5 – Karaiko Village after the Goron Mines
- Legend of Zelda Twilight Princess Walkthrough for the Wii –Part 6 of 10– Lakebed Temple
- Legend of Zelda Twilight Princess Walkthrough for the Wii – Part 7 of 10 – After the Lakebed Temple
- Legend of Zelda Twilight Princess Walkthrough for the Wii – Part 8 of 10 – Arbiter’s Temple
- Legend of Zelda Twilight Princess Waltkrhough for the Wii – Part 9 of 10 – Snowpeak Mountains
- Legend of Zelda Twilight Princess Walkthrough for the Wii – Part 10 of 10 – Sky Temple and Final Bosses